Showing posts with label create. Show all posts

Sunday, February 16, 2014

The Pumpkin Shortbread Baby

Hello Sweets,

I have had a terrible weekend :(  As if it wasn't bad enough that I felt sick, but Nathan sent me a beautiful bouquet of flowers for valentines day.  No that is not the bad part, the bad part is Canpar gave a fake phone number to call the driver to ensure I get them in time O_o  Yup, a fake number!!!!!  It's a holiday Monday here in Canadia and they don't deliver on weekends, so my beautiful flowers will sit in a cold warehouse for five days.  It's hard enough to be in a long distance relationship on valentines day, but finding out that he sent me a stand in gift until we're together to celebrate and the company screwed it all up is heartbreaking.  I'll be sure to share with y'all what the bouquet looks like when it finally gets to me, at least I know the card and vase will still be intact.  I'm very fortunate that I have a thoughtful boyfriend, it just makes things harder when we're in different countries.  Well it could always be worse, he could be in Japan lol.

Since valentines day was on Friday, I did make a sweet treat but I won't be sharing that will y'all today lol.  I know I'm cruel, but I had one more recipe to get caught up so I decided to write about this one instead.  Lately I've been making a lot of pumpkin themed food, but that's only because the can is big and there are always leftovers.  When I found a recipe that included my favorite cookie, shortbread, I didn't have to look any further for what to do with the leftovers.

Pumpkin Shortbread
Ingredients
cookie
1 1/4C flour
1/2C cornstarch
1 1/2tsp pumpkin spice (I made my own as usual ;) cinnamon, nutmeg, allspice, ginger)
1/2tsp salt
3/4C butter, room temperature
3/4C powdered sugar
glaze (I opted not to use this)
2C powdered sugar
2-3Tbs milk
 

Directions:
1)  Preheat oven to 350F.  Spray 9" tart pan with nonstick cooking spray.
2)  In a bowl; whisk together flour, pumpkin spice, cornstarch, and salt.  Set aside.
 

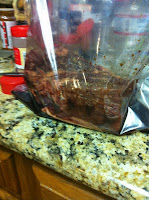
3)  With a mixer beat the butter and powdered sugar until smooth.
 

4)  Add in pumpkin and beat until combined.
 

5)  Turn mixer to low and add in dry ingredients until just incorporated.
 

6)  Spread dough into the prepared pan, smoothing with a rubber spatula.  Bake 60-70 minutes until formed and golden brown.
 

7)  Cool in pan for 5-10 minutes, then transfer to wire rack.


8)  Mix up glaze in a bowl, stirring until there are no more lumps.  Pour on top of shortbread.  Let glaze set, slice and serve immediately.
so yummy!
 The pumpkin flavor is so very subtle and not over powering, anyone that is unsure of pumpkin will warm up to this little cookie.  My grandparents thoroughly enjoyed it, and that makes me very happy.  Since I didn't use the glaze, it's best eaten with a glass of milk because shortbread isn't a very moist type of cookie.  This is definitely a keeper for me, I love shortbread so when I find a variation of the treat, I'm sold.

So I finally finished Nathans valentine gift, but cannot share it with y'all until after I see him because as you know he is the editor of my little baby.  I want to share it with y'all so bad, but I can't so I won't lol.  All I'll say is, I think it's the perfect gift to give someone who is in a long distance relationship.  I've also have the itch to start a new painting, I do have a painting currently in progress but I really have an idea I need to get on canvas.  First I'm going to make myself some dinner, and the perfect dinner is......breakfast!!  Yup, I'm really looking forward to it lol.  Until next time....


Stay sweet,


Jennifer xoxoxo


Monday, January 13, 2014

Chocolate Warm Ups

Hello Sweets,

Since it's Monday I thought it would be fun to do a small, simple, but always delicious post :)  For those of you whom aren't familiar with my blog geographically, southern Ontario Canada has been getting pummeled by old man winter.  Thankfully for me I've been in Texas since Christmas so the weather here has been significantly milder, but I am not looking forward to my return home later this week :/  I have my winter jacket and boots with me so I am prepared clothing wise, but today was  70F (21C) so I am sure no matter what I wear I'll be freezing.

What is your favorite beverage on a cold winter day?  A hot cup of coffee or tea?  Maybe you add a little Baileys, lol or maybe you're completely PG like me and you enjoy a good old fashion cup of cocoa :D  I hadn't had a cup of cocoa in years, so in November when the DFW area got slammed by an ice storm cocoa went on the "must buy" shopping list.  Funny thing about the ice storm though, it caused deliveries to stores (ie; grocery stores) to become non existent lol.  I have never been in a grocery store where the eggs, milk, and many other things were completely sold out.  Of course the cocoa section of the grocery store was cleaned right out, well except for the instant add hot water thingies.  However, Nathan prefers the ones that require you to softly boil milk so they were not an option, actually I prefer them now too lol.  Feeling almost defeated we went to Starbucks to get some lattes, seeing they still had some of their cocoa left we decided that would do in a pinch.

Super Simple and Easy Cocoa
Ingredients
hot cocoa powder
milk
mini marshmallows or whipped cream
Ghirardelli makes everything chocolate even more amazing!!

Directions:
1)  Determine how many cups you'll need to make, if using large cups use 1 1/2 - 2 servings per person.  Measure out amount of milk needed, place into a saucepan and bring to a slow boil.

2)  Once boiling, add 1-2Tbs/cup of the cocoa powder and mix well.

3)  Pour into cups, top with mini marshmallows or whipped cream.  If you only have regular marshmallows, cut them into smaller pieces with a sharp knife (it will be uber sticky, so use patience). 
sticky, yet yummy work


perfect addition to a cold cuddle night
See, simple but delicious :)  Nothing beats a hot cup of cocoa on a chilly night, well nothing except cuddles!  Until next time....

Stay sweet,


Jennifer xoxoxo


Friday, September 20, 2013

Stick a Fork in Me, I'm Done!

Hello Sweets,

Well I am still very upset and mad at myself :(, but the show must go on right?  I'm really trying to keep myself busy and not think about the colossal mess I've made, unfortunately there are so many things that remind me of him it's kind of hard.  However I figured I wouldn't bum y'all out today with another sad post, instead I am going to write about food something I don't screw up often :s

I just realized that my previous statement is going to be harder to stay true too :(  Why you ask, because this entire meal was made while in Texas and we made it together.  Maybe I can use this little post as a happy memory that will sort of pick my mood up, this is me trying to be hopeful :/  I wrote a post very similar to this earlier in the year (food wise that is), but we chose to do things a little differently this time :)  For me the pressure was really on this time around, you see we were cooking for his entire family and I wanted everything to go perfectly.  I don't know why but I always seem to put pressure on myself in these situations, but I think it works..sometimes lol like this time.  Having a family judge your cooking skills is both stressful and a learning process, I just hoped they would enjoy what they were about to eat.  Thankfully they enjoyed every part of the meal, even Nathan's dad enjoyed my yorkies!  For the record, I knew he would but he still protested lol.

Nathan and Jennifer's Collaborative Roast
Ingredients
Roast, either chuck or rump
red wine
Worcestershire sauce
garlic
garlic powder
meat tenderizer
salt
pepper
seasoning salt
 

Directions:
1)  Tenderize and season your meat to your preference, then place in a gallon zip lock bag and add enough wine and Worcestershire sauce that the roast becomes submerged.  Remember to balance the wine and Worcestershire sauce, I can't give you measurements but you should be able to tell by the smell.  Refrigerate overnight.


2)  Preheat oven to 375F.  Cut up your carrots, onions, and potatoes (anything else you want to throw in there too!).  Place in the bottom of your roasting pan, surrounding the roast.  Pour your marinade over top of the roast and veggies, add more garlic to the top of the roast.


3)  Cook for about 2 hours (depending on the size of your roast), checking after 1 hour to ensure the veggies aren't drying out.  If they're sort of dry add either beef broth or a dissolved bullion cube.
 

Some people like to cook their vegetables separately, but when you cook them in the roasting pan they soak up the marinade and don't need to be seasoned after :)  This was the dinner that accompanied the super yummy Cherry Dr. Pepper Cupcakes, see;
 

All the work was worth it, not just because Nathans family enjoyed it but because he did and he is a big reason I want to cook from scratch.  He's also the only person that's ever encouraged me to pursue my dreams of Canuckette's Creations as a business.  I'm making cupcakes for a party my mother is throwing tomorrow, and the box that will be carrying them will be adorned with my little logo.  It's a big step and actually kind of scary, but if I'm going to do this I need to be willing to put myself out there.  Maybe he'll read this post, if he does I want him to know how thankful I am for the encouragement and I hope it makes him proud.

Speaking of which I need to get back to the kitchen, I need to crank out two icings tonight and then decorate them too!  Wish me luck and keep your fingers crossed that I do okay tomorrow.  Until next time.............


Stay sweet,


Jennifer xoxoxo


Monday, August 5, 2013

I Love You a Waffle Lot!

Hallo Snoep/Hallo Süßigkeiten/Bonbons Hello,

In other words, hello sweets!  Are you ready to take a trip across the pond (the North Atlantic Ocean that is)?  If you haven't already guessed, we're on our way to Belgium, courtesy of our imaginations :)  I did a little research on Belgium and discovered a few fun facts; 1) they have 3 official languages dutch, German, and french 2)  they're government is similar to the UK monarchy and 3) they're a very artistic culture.

Okay enough history :) I'm pretty sure y'all know what I made.  It's both good as breakfast or a dessert, with syrup or with whipped cream and strawberries.  If you guessed waffles you'd be correct and not just any old waffle, a buttermilk waffle.  Did you know they have five varying types of waffles in Belgium and Belgian waffles isn't one of them?  They can be soft or crispy, topped with confectioner's sugar or syrup, and some are even heart shaped with cherries on top (sounds like my kind of waffle).  So even though the recipe I'll be sharing today isn't from Belgium, that is where the idea was born and thus we give thanks.  Another fun fact about waffles, they've been around since medieval times (9th-10th century).  Although back then the waffle iron usually depicted Jesus and his crucifixion, that would make for an interesting breakfast.  I know I said no more history, but that was applicable to Belgium not waffles (sneaky sneaky) lol.  In the 14th-15th century waffles were made with wine (sign me up lol), from then on they continued to evolve and still do to this day.

About a year ago Nathans dad bought a waffle iron and we had waffles all the time, and then of course the fad died and it rarely was used.  Well Nathan and I had to be up early one morning, knowing Nathan is much less of a morning person than I am, I offered to make him waffles (that got a smile).  So I looked at different recipes, and then came across the cutest named blog, Smitten Kitten.  She creates comfort food that reminds you of home but with a dash of new and exciting, you should check it out there is lots to see and read (although probably best to look when you're not hungry).  Since I still had buttermilk leftover from Dave's Chocolate Cola Cake I decided that buttermilk will be the shining star.

Buttermilk Waffles (via Smitten Kitten)
Ingredients
2C all-purpose flour
1/2Tsp salt
2Tbs sugar
1 1/2Tsp baking soda
1 3/4C buttermilk
2 eggs, separated
4Tbs butter, melted and cooled
1/2Tsp vanilla
cooking spray for the waffle iron
 

Directions:
1)  Combine the dry ingredients.
  

2)  Mix together the buttermilk and egg yolks.  Stir in the butter and vanilla.

3)  Brush the waffle iron with your cooking spray and preheat it.  Stir the wet ingredients into the dry ingredients.
 

4)  Beat the egg whites with the whisk until they hold soft peaks.  Stir them gently into the batter.
 

5)  Spread a ladle full or so of the batter onto the waffle iron and bake for 3-5 minutes.

 
yum!

These waffles are light and fluffy, but super filling, I could only eat about 3/4 of it before I was way too full.  This is now my go to waffle recipe for Nathan, because as with everything else once I find a good recipe I no longer use boxed mixes.  Nathan really liked them, he managed to eat a whole one faster than I could eat half of mine lol he's too cute.

Well I am almost out of past recipes to post, which is pretty much divine timing because soon I'll be back in Texas *happy dance* !!  That means I can make all sorts of goodies and there are plenty of happy mouths down to help devour them :)  Until next time.......................................................

Stay sweet,


Jennifer xoxoxoxo


Tuesday, July 30, 2013

Simply Sour

Hello Sweets,

I want to apologize in advance because this will be a fairly short post.  I had a hard time sleeping last night because of the needles I had earlier in the day, and I am still very sore :(  On the bright side, since I couldn't sleep I found myself looking for something to watch and came across a show I watched while in late middle school and high school.  See I have a soft spot for anything horror, and naturally I enjoyed watching "Tales from the Crypt".  Even though it is really old and sort of cheesy, it allowed me to forget about the pain even if only for a moment.  However, this is the first post in my fourth of July series :)  I only made two treats for the celebration as it was a small number of family that got together, so two posts will be about edible treats and the third will be about my very first fourth of July celebration.

Now I had always envisioned the fourth as a huge deal full of family bbq's, fun in the sun, and of course a crazy display of fireworks.  The last few years (according to Nathan) have been a little quieter but at very least I would get to experience "American" fireworks in all their glory!  So naturally I wanted to make somethings for the bbq portion, from scratch of course lol sometimes I go right in to house wife mode and there is no stopping me.  I wanted to make a beverage, a side salad, and a dessert but unfortunately I didn't have time to make the side salad (sad face).  So since I'm experiencing discomfort I thought I would start with the beverage and hopefully tomorrow I'll be as good as new, well at least to the best of my ability lol.

Fresh Lemonade (adapted from Disney Family Cookbook)
Ingredients
5-6 large lemons
1C sugar (I used about 3/4)
2qt water
an extra lemon to slice for garnish

Directions:
1)  Cut the lemons in half and squeeze each of them into a large measuring cup.  *should yield 1 1/2C of juice*
 

2)  In a large pitcher or mason jar, combine the juice and the sugar.  Stir in the cold water and serve over ice.
 

I didn't use as much sugar as it called for (or what is depicted for that matter), because I didn't want it to be overly sweet but more tart.  Nathan's dad, who you may remember as the lemon lover from my lemon cookie recipe, loved it too!  I even mixed it with some iced green tea I had made earlier in the week and hello yummy town :)  I guess it all depends on your preference for lemonade, but I will tell you once you make it you will never go back to store bought or frozen again.

Well y'all I am going to go kick my feet up and relax in hopes of forgetting about the pain I'm in.  As always I love hearing feedback from each of you, so don't hesitate to drop me a line in the comment box or shoot me an email :)  Until next time........................................................


Stay sweet,


Jennifer xoxoxo

Friday, May 31, 2013

No Monkey Business....well maybe a little

Hello Sweets,

I know I've been MIA again, but this crazy weather has been wreaking havoc on my head and body :(   I don't mean like ouch I've got a headache, more like someone has put my head in a vice and keeps screwing it tighter and tighter, which makes me one sad little girl.  But the blog must go on right?  Which is why I've decided to start teasing your sweet tooth tonight with the first of many cookie recipes.

As you may or may not know my little sister is getting married (actually it's tomorrow), and I offered to make cookies for the reception.  In all honesty I'm regretting doing that, I know that doesn't sound very sisterly but I always overreach with my capabilities and this has been very painful for me.  Standing in the kitchen to make one batch of cookies wouldn't be so bad, but I've had to triple each batch and shape them into their initials four different times.  I've probably spent upwards of twelve hours in the kitchen and my body has screamed loud each and every time, but before anyone questions I did break it up over five days, unfortunately that didn't seem to help much at all :(

I figured I would start with my favorite persons cookie, that being my little cutie of a nephew :)
 An old pic but his cuteness hasn't faded!

So when I had to decide what type of cookie the "m" would be I knew it was pretty obvious, my little monkey loves banana bread so why not a cookie?  That meant I'd have to research to see what I could find, I've made banana bread and muffins but never a cookie.  In the midst of my searching I took a break to relax by checking my Facebook, earlier that week I had started following a page of recipes and what was on my news feed?  Banana bites!!  If you have Facebook check out the page "recipes" it's a closed group but they will add you shortly, they are full of yummy recipes and people are constantly sharing new ones :)

Banana Bites
Ingredients
1C white sugar
1/2C butter, softened
2 eggs
1 1/2 ripe banana, mashed
1Tsp vanilla
2C all-purpose flour
1Tsp baking soda
1/4Tsp salt
1/2Tsp cinnamon (my addition)

Directions:
1)  Preheat oven to 350F.  Coat baking sheets with cooking spray, I like to use coconut oil personally :)  In a large bowl, cream together sugar and butter until light and fluffy.

2)  Add eggs and beat thoroughly.  Beat in mashed bananas and vanilla until well combined.

3)  Gradually blend in flour, baking soda, and salt.  Mix until just combined.

4)  Drop mixture by teaspoonfuls onto the baking sheet (I made mine into letters), baking for 12-15 minutes.  Remove to wire racks to cool.
 
I didn't like the way they looked all blob like, so I cut them once cooled with the cookie cutter again :)

Well there you have it lovely readers, cookie number one complete and not a moment too soon because my shoulder and low back are starting to bug me :/  I probably won't be posting tomorrow obviously because of the wedding, hopefully I'll be back Sunday with another cookie recipe and maybe even a few wedding pictures.  Until next time...................

Stay sweet,


Jennifer xoxoxo


Monday, April 29, 2013

Strawberry Fields

Hello Sweets,

Spring is finally here, to anyone other than a Canadian you've probably already been experiencing warmer weather but we just got ours.  I love spring time (but not as much as summer), the smell of rain and fresh cut grass to fresh fruit and veggie stands from local farmers.  Although nothing is better than going berry picking, and here in south western Ontario we have some wonderful berry farms!  I know it's a little early in the season to be picking (actually WAY too early), but I couldn't help but start dreaming about all the wonderful treats that can be made with farm fresh produce :)

My roommate bought too many strawberries and told me to help myself to them, and you know what happens when I've been day dreaming of creative treats and a present like that is drop on me?  You guessed it, I wanted to bake with them!  I recently came across this really cook foodie website where they share all sorts of recipes and tips called Mr.Food.  So I started looking at the different strawberry recipes and came across one that I thought sounded pretty interesting.  I add a few extra ingredients of course, but they were my inspiration!

Fast Strawberry Cobbler
Ingredients
1/2C butter, melted
1C self rising flour
1/2C white sugar, divided
1/4C brown sugar, divided
3/4C milk
2C fresh strawberries, quartered
1/2C water
1Tsp cinnamon

as you can see the additional ingredients were an in progress thought :)

Directions:
1)  Preheat oven to 350F.  Pour melted butter into a 1 1/2 quart glass baking dish.

2)  In a large bowl, combine flour, 1/4C sugar (half of each), and milk pouring evenly over the butter.

3)  In a separate bowl combine strawberries, remaining sugar, and water; spoon evenly over the flour/milk layer.  DO NOT STIR.


4)  Bake for 45-55 minutes, or until golden.  Serve warm or cold.
*side note*  I ended up with more liquid than I would have liked once it was done baking.  I simply drained it off and simmered in on the stove top to make a simple syrup to go with the dessert, it turned out perfectly!


I think the next time I make this I will try a different berry and possibly use brown sugar only, but who knows what else I'll have dreamed up by then right?  Either way remember to have fun, and if something has gone not according to plan think of a way to make it work for you instead of against you.

So I have now began the cookie research phase and I think I'll be trying a batch tomorrow of one of the first three cookie, after all I need the first three chosen before creating the third!  So be prepared for cookies, cookies, and more cookies!  I am both looking forward to and dreading this all at the same time, since I like things like this to be perfect it will take some time.  I know this has been a fairly short post but I started with a mild migraine and now it is full force, so it is time for this girl to relax.  Until next time............................


Stay sweet,


Jennifer xoxo