Showing posts with label traditional. Show all posts

Tuesday, February 4, 2014

Chocolate, Need I Say More?

Hello Sweets,

Well it has been a long weekend of moving but it's finally complete, and again I am sleepy lol.  However, Nathan was in Canadia to help me with everything, he actually went above and beyond anything you'd expect!  He not only put up every shelf, and picture, he also assembled furniture and bought me a new tv :D  Seriously I am one lucky girl, well except he is now on his way home :(  The hardest part of our relationship has to be the "see you soon" goodbyes, it never gets any easier.  He was a HUGE help in making my new apartment a home, and even though it's almost done it just isn't the same.  I now consider this apartment "our" apartment because we did so much together, he'll be back sooner than later and until then I'll complete the look and it will be a home!

Even though I had lots of help on Saturday, it still was quite difficult for me.  On the bright side, this whole ordeal is almost over.  This process has been wreaking havoc on my body :(  Since I had family and some friends helping me move, I decided to give them food as thanks :)  Nathan and I marinaded a roast Friday night to serve Saturday, and I will threw it in the oven while all the moving hoopla took place so it wouldn't be long before we could eat.  Of course there were plenty of sweet treats as well.  The pumpkin pie bars made their debut appearance, the oh so delicious pumpkin spice cupcakes (happy accident not intentional for there to be a pumpkin theme), and of course today's recipe.  No today is not a pumpkin recipe, although with the left over pumpkin from the cupcakes I could have made something.  Nathan requested I bake these though, so I thought I would make sure there was something sweet for him when he got here.

Soft and Chewy Chocolate Chip Cookies
Ingredients
2C flour
1/2tsp baking soda
1/2tsp salt
3/4C butter, melted
1C brown sugar, packed
1/2C sugar
1Tbs vanilla
1 egg
1 egg yolk
2C semi sweet chocolate chips
 

Directions:
1)  Preheat oven to 325F.  Grease cookie sheets or line with parchment paper.  Sift together the flour, baking soda, and salt; set aside.
 

2)  In a medium bowl, cream together the melted butter, brown sugar, and white sugar until well blended.
 

3)  Beat in the vanilla, egg, and egg yolk until light and creamy.
 

4)  Mix in sifter ingredients until just blended.
 

5)  Sift in the chocolate chips by hand using a wooden spoon.
 

6)  Drop cookie dough 1/4C at a time onto the prepared cookie sheets.  Cookies should be about 3" apart.
 

7)  Bake for 15-17 minutes in the oven, or until edges are lightly toasted.  Cool on baking sheets for a few minutes before transferring to wire racks to cool completely.


These little bad boys are perfectly soft, not so soft it crumbles apart in your hand but that perfect way that I remember my high school cafeteria serving.  Normally this is not my first choice of cookie, but this recipe is so yummy even I can't stop from eating a couple.  The dough even reminds me of the cookies my mom used to make, and I love me some cookie dough.  It was hard to not eat all of them before Saturday lol.

Well I've got a few more things to try and tackle tonight, but to be honest I really just want to have a nap lol.  If Nathan was here he would tell me to take one, maybe I will since everything isn't going anywhere :p  Hopefully afterwards I will be more energetic and can tackle yet another good chunk organization done.  Until next time....

Stay sweet,


Jennifer xoxoxo

Monday, January 20, 2014

A Review Just For You

Hello Sweets,

I hope y'all are having a better day than I am :(  I feel as though I was literally hit by a truck, even to the point I had to cancel my plans today.  I know I promised a sweet post today, but considering the way my body feels I figured a restaurant review would be suffice.  Then tomorrow I will get back into the swing of things, I have a feeling that tomorrow will be a better day :)

When Nathan came up to visit me a couple months ago we went to my favorite little Vietnamese restaurant here in town.  Ben Thanh's is a wonderful little restaurant located in Southwestern Ontario, and it is one of our go to dinner dates while here :)  The last time we went I decided to head there for dinner, I thought it would be fun to capture our meal and share with y'all :)

Date night!
Delicious Jasmine Tea
Deep fried wontons, filled with cream cheese and diced veggies
I love the sweet and spicy dipping sauce
My deluxe pad Thai, seafood and chicken mmmm
Nathans beef tenderloin cubes, with a spicy Thai BBQ sauce
There is nothing I love more than a dinner date with my soul mate, I have never been disappointed dining at Ben Thanh's.  The staff is friendly, efficient, and the food is amazing.  If you have one near you, check it out.  You won't be sorry :)  Until next time....


Stay sweet,


Jennifer xoxoxo 


Tuesday, October 8, 2013

Happy Birthday to My Little Blog!!

Hello Sweets,

** ~HAPPY 1ST BIRTHDAY CANUCKETTE'S CREATIONS!!!!~**
It's my birthday and I'll dance if I want to, sing if I want to!!!  But since it's my blogs birthday I won't steal the show lol :p  One year ago today this sweet little blog was born, and I can't believe that it's still going strong and getting stronger every day!  I love that it's helping both me and others, keeps my brain sharp and brings yummy goodness to all my lovely readers :)  Not to mention it has forced me out of my  box in regards to risks I take in the kitchen.  You can't learn  and expand your repertoire by playing safe right?

So I thought it would be fun to reminisce about what I've done it the past year, and where I hope to go in the next year :)  I'll be the first to admit that I've had my fair share of fails this year, the most memorable would have to be the "brick" I baked.  My first attempt at Whole Wheat Honey Loaf was a complete and utter disaster lol, the yeast didn't activate but I thought it had.  So of course after it came out of the oven it was flat and very dense, but I wasn't going to let that detour me!  I gave it a go again the next day and it turned out exactly as it was supposed to :D  Lesson learned, like the post is appropriately named "with baking there is no fail, only lessons to be turned".  Just because something doesn't turn out the way you intend doesn't mean you should give up, always remember that while in the kitchen ;)  Probably the most trouble I've had while on my journey is with activating yeast, it's such a temperamental product that you have to make sure all the aspects are perfect.  If at first you don't succeed, try again, and that is a kitchen motto!  Another lesson I'm taking from this year is never be afraid of a product that you haven't used before.  I had never baked with pumpkin puree before and most thought the cupcakes sounded weird, but boy do they taste good!  For right now let's get to the birthday treat I made for today's blog, and no it's not cake not even a dessert technically but I made it a little sweet ;)  Just like me lol :p

Indian Fry Bread
Ingredients
4C all-purpose flour
1Tbs baking powder
1tsp salt
2Tbs powdered milk
1 1/2C warm water
1C shortening
extra flour for your hands
 
(I used fresh milk instead, just swap the measurements and I used olive oil instead of shortening)

Directions:
1)  Put flour, baking powder, and salt (and powdered milk if you're using it) into a large bowl.  Mix thoroughly.
 

2)  Mix in warm water and milk to form dough.
 

3)  Cover hands in flour, knead dough by hand until it is soft but not sticky.  Cover with a cloth for 15 minutes.
 

4)  Shape dough into balls 2" across, then flatten by patting and stretching the dough.
 

5)  Melt shortening about an inch in a deep frying pan.  When hot put the dough in, frying one side until golden brown then flip and repeat.


4)  Serve either as a taco shell for Indian tacos or serve with warm honey.
 

 These are delicious served right away with the warm honey drizzled over top.  My only issue was that I think I needed to flatten and stretch them a little more next time, that way they will be more bubbly for a lack of a better word lol.  What I'm trying to say is that as it fries it will puff up more and create bubble pockets :)  I know that isn't a "typical" birthday type celebration treat, but it was something I never tried before and have been wanting to.  What better day then my little blogs birthday ;) 

So what is in store for Canuckette's Creations this year?  Well for one I'm taking the big leap into a mini business, nothing crazy just enough to occupy my time and to see others smile.  Of course I will be trying new, different, and unique dishes.  If any of y'all wanted to suggest something you'd like to see me try feel free to drop me a line and I will do my best to make it happen :) 
** ~HAPPY 1ST BIRTHDAY CANUCKETTE'S CREATIONS!!!!~**

A big thank you to my editor, publisher, and love of my life Nathan.  Without you and your loving encouragement this wouldn't even be happening!  I love you, always and forever I promise.  There isn't enough thanks in the world to express how much your support means to me :)  Until next time.....


Stay sweet,


Jennifer xoxoxoxoxo

Sunday, December 23, 2012

Come On Shortround!

Hello Sweets,

Only 3 more days until jolly old St.Nick is here :)  Have you finished all of your Christmas baking yet?  I hope that everyone has finished their shopping because I am sure the malls are CRAZY right now, lol.  Can you tell I've finished already?

So since the world didn't end (although now they're saying the 23rd, jeeze lol), as promised, I have a new Christmas baked good recipe!  One of my favorite Christmas cookies is of traditional Scottish or English descent.  Have you guessed which cookie it is yet?  Well if you guessed shortbread, you've won a new recipe lol.  Actually, everyone wins the recipe because it's just too good to not share with the world :p  Now I have this one, a traditional shortbread, and tomorrow I have a twist on the original (I wouldn't be Canuckette if I only had one).  Let us get to the goods, come on Shortround (see what I did there)!!!

Scottish Shortbread (via All Recipes website)
Ingredients
1C butter, room temperature
2C all-purpose flour
1/2C powdered sugar
1/4Tsp salt

Directions:
1)  Preheat oven to 350F, placing the racks in the first and third section of the oven.

2)  In a large mixing bowl; cream together butter and sugar.

3)  Slowly add the flour and salt, mixing well.
 

4)  Roll dough out with a rolling pin until it is 1/4" thick (sorry forgot to take a pic of the 1/4" dough).  

 5)  Cut into desired shapes using cookie cutters.  Place on cookie sheet and prick with fork.

6)  Bake for 5-8 minutes, or until sides are a light golden brown.  Let cool on cookie sheet for 1 minute, then transfer to a wire rack.
Yummy final product!

These cookies embody everything that makes a shortbread cookie, the buttery flavor, the subtle sugar, and the crisp outer edges and the soft middles.  Nathan is, again, a very very happy cookie tester, and I have almost completed the cookie tins that I am going to give to Nathans family.  I haven't baked this many Christmas cookies, ever.  I baked a whole whack before with my mom, but not this many different recipes.   I have however enjoyed it immensely, and even though I have gotten frustrated a few times, it really has cemented my passion for the kitchen.

Now don't forget to come back tomorrow and get not one, but two new recipes!  You already know that one will be a twist on the traditional shortbread, but the other will remain a secret until tomorrow to entice you back  for another awesome post lol.  Until next time...........

Stay sweet,


Jennifer xoxoxoxo

Saturday, December 15, 2012

Give Me Some Sugar

Hello Sweets,

Happy Friday! Can you believe that in 11 days it will be Christmas?  Which means my kitchen isn't the only one going full steam.  What treats are all of you baking?  Maybe something sweet or maybe savory? Whatever you're making, I'm sure your loved ones are dying to get their hands on some.  I completely forgot to tell you guys the story of a cookie monster yesterday.  While waiting for the "reindeer" cookies to cool before decorating, Nathan's dad decided to munch on one while we were all watching a movie.  The only reason he got caught is because I was checking on my icing to ensure it wasn't hardening, and I'm pretty sure I scared the bejesus out of him with my reaction lol.  Then after they went to bed I started thinking my reaction was too strict, so once the cookies were hard and the antlers were set I left a surprise in his car since he had an early flight this morning.  Now he isn't back yet so I don't know his reaction, but I'm sure it put a smile on his face :)  ** UPDATE: he loved it, and it did make him smile very early this morning :)**

So yesterday I made the chocolate sugar cookies, well today I wanted to be more traditional (I think wrapping presents made me nostalgic) so I made the original sugar cookies.  This recipe is quite simple, very few ingredients and basic instructions, that makes it user friendly for even the beginner baker :)  I must warn you though, this recipe like any other sugar cookie recipe requires some time to set in the refrigerator before they can be put in the oven.  This is always the hardest part for me.  Yes it's true my patience could be better, but who wants to wait that much longer for delicious cookies?  But I will always take the time and wait because it is part of the reason they taste as good as they do :)  Let's get baking!

Traditional Sugar Cookies
Ingredients
1C butter, softened
1C granulated sugar
1 large egg
1 1/2Tsp vanilla extract
3C all-purpose flour
1 1/4Tsp baking powder

Directions:
1)  Beat together butter and sugar until light and fluffy.

2)  Add egg and vanilla, mix until just combined.


3)  Add flour and baking powder in intervals.  Dough will seem as if it doesn't have enough moisture but continue to mix with mixer until combined (it will come together when chilled).


4)  Divide the dough into four equal parts, shape into disks, wrap with plastic wrap and refrigerate for about an hour or until firm.

5)  Preheat oven to 375F.  Lightly grease baking sheets or line with parchment paper or a non stick baking mat.

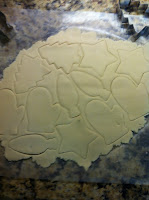
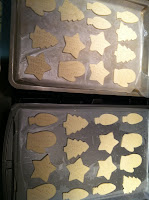
6)  Roll out dough between 2 sheets of waxed paper, about 1/4" thick for crisper cookies and 1/3" thick for softer cookies.  Cut out shapes with cookie cutters and place on prepared cookie sheets.  Bake for 7-8 minutes or until edges just start to turn a gold color.  For softer cookies, do not allow the cookies to take on color.


7)  Remove from oven, let cool for 1 minute then transfer to wire rack.  (if making a second batch right away, allow the cookie sheet to cool completely before placing raw dough on it)


8)  Decorate cookies with Royal Icing (click here!) or with a butter cream frosting and sprinkles (or whatever decorations you'd like).  Can be stored in freezer undecorated for up to 2 months.  Dough also freezes well.
Sorry these aren't all of them, it's been a looong night

These cookies may be simple to make but they smell and taste wonderful, and don't be alarmed with the dryness of the dough because it will come together when you roll the dough out.  This is just one of many sugar cookie recipes I will be trying and after I try them all I will determine which is the tastiest :)

I will continue working hard on making the cookies look professional, because that is a personal goal of mine :p  But for now I will enjoy eating the fruits of my labors, and making Nathan a super happy boyfriend :)  Until next time.........


Stay sweet,


Jennifer xoxoxo 

Thursday, October 18, 2012

The quickest way to a mans heart, is through his stomach!

Hello Sweets,

One of my favorite times to bake or cook is for those that mean the most to me.  Nathan is my absolute favorite person to cook for, and cooking for his family is very important to me, or better yet that they like what I make.  At the risk of sounding old fashion or dated, I really do want to be that wife and mother who cooks and bakes on a regular basis.  Some of my fondest memories as a child were being in the kitchen with my grandmother baking (my favorite part was the flour sifter lol), and watching my mother in the kitchen cooking dinner, but not following a recipe but using her sense to determine the right flavors.

Needless to say, today's post is about not one, not two, and but three recipes!  I made Nathan and his father a yummy chuck roast dinner last night with all the fixings.  I went out immediately after to spend some quality with Nathan's aunt, so I only got the "thanks for dinner Canuckette, that was good".  So of course when I returned later that evening, I asked Nathan what his dad really thought, and this is the direct quote from his father,"girl can cook".  This makes me very happy because I love knowing how much his family likes me, family is very important to me, and when you date someone, you connect two families together, and that is precisely what I want.  So for dinner last night I made a chuck roast with roasted potatoes, onions, carrots, corn, gravy, and Yorkshire pudding (a little bit of English to our country dinner).  Everything is relatively simple to make, but remember as with anything you make, make it from the heart ;)

Okay on to the recipes!!

Chuck Roast
Ingredients
coarse black pepper
 garlic powder
some fresh roasted garlic
Lea & Perrins Worcestershire sauce
 Lowry's Steak and Chop marinade
sea salt, Lowry's seasoning salt
 Adolph's meat tenderizer
5 medium sized potatoes, chopped
5 whole carrots, chopped
1/2 a large yellow onion, chopped
1C beef broth or 1 bullion cube, dissolved

My roast soaking in its bath lol

Directions:
1)  Go to the butcher and ask for a chuck roast or seven bone roast (the bone in the center is shaped as the number seven), the more marbling, the better the flavor.  Now I cannot give you the weight of the one I made last night as they bought a whole cow and just had the butcher package their meat for them, but we fed about 6 people.  Now, if you have time you should season or marinade the beef overnight, this way the meat really soaks up all the flavor and will fall apart.  Also, pierce the meat with a fork to allow that much more absorption.  Choose what ever seasonings/marinade you would use of a steak, I do not use BBQ sauce on a roast but that is my preference.  Apply any liquids you chose to use first as to not wash away the seasonings.  Your marinade mixture doesn't necessarily have to submerge the meat, about half full will do, just be sure to flip the roast over at least once (preferably about halfway from prep to cook), then place in the fridge overnight. If you don't have time for overnight, try and get a least a couple of hours. Be sure not to dispose of the mixture the roast is in, as it will contribute to cooking in the flavor, moisten, and will serve as the main ingredient in the gravy 

2)  Preheat your over to 375F. While the oven is preheating, cut up your potatoes, onions, and carrots.  I like a rustic type of meal with my roast, so I tend to cut bigger and not uniformed.  Place the veggies around and on the roast, top with a little bit of beef broth or bullion, cover with tin foil.  Place into the oven for 2 hours, checking after one to ensure the veggies are not drying out, if they are, add a little more of the broth to moisten the veggies.
standing room only!

While that was cooking, I moved on to prepare the Yorkshire puddings!  I start this one hour into the roast cooking to allow the batter to sit for 30 minutes, and then cook in the oven with the roast for the last 30 minutes.

Easy Yorkshire Pudding
Ingredients
3 eggs
1C milk
1C all-purpose flour
2tbs butter

Directions:
1)  In a medium bowl, beat eggs with milk.  Stir in flour and set aside. 

2)  Divide butter evenly into the 12 cups of a muffin tin, about 1/2 tsp per cup.  Place empty tin into the oven to melt the butter for 2-5 minutes.  Remove tin from oven, and distribute batter evenly among buttery cups.

Completed batter and butter divided 
notice the brown on the edges?  That's the melted butter

 3)  Bake in preheated oven for 5 minutes.  Reduce heat to 350F, and bake for 25 minutes more or until puffed and golden.  It is okay to drop the heat while the roast is still cooking as it is only for the last 30 minutes.

All done, YUM!

Next up is the gravy!

Simple Gravy
Ingredients
1 1/2C of the roast drippings
flour

Directions:
1)  Transfer 1C of the drippings into a sauce pan and bring to a boil.  Slowly add flour to thicken the consistency.  If lumps form, add a little more of the drippings.  Depending on your preference of thickness, continue adding flour until you've reached your desired consistency.

2)Enjoy!


Completed feast in all its glory, boys couldn't wait to dig in obviously lol

Needless to say, no one went hungry last night, and we even enjoyed some for lunch today :)  Now tonight I am going to make the famous pumpkin spice cupcakes and will be posting that little gem tomorrow!  Until then....

Stay sweet,


Jennifer xoxoxo