Showing posts with label Christmas. Show all posts

Sunday, December 30, 2012

Baby It's Cold Outside....

Hello Sweets,

I hope you all had a fantastic Friday :)  Nathan and I had a great day.  We picked up some new blue rays and then he took me out to eat at one of my favorite restaurants, Red Lobster!  I LOVE seafood, and I fully believe that it is worth all the hard work that is required to get to the succulent meat.  Now that I am completely full, we are having a full on "gamers" night full of sugar and Star Wars.  I know I know I'm a little geeky, but hey whatever is fun for you, you should do!

Since we are going to be busy most of the night, I thought I would try and write my blog on our breaks, and since I don't have a super complicated recipe for all of you, I think it will work!  So I bet you're wondering what the correlation is between my title and the recipe; well it's simple they're both cold :)  Last year, I spent my first thanksgiving with Nathan's family, and for dessert they had something I had never seen before.   Have you heard of Ice Box Pie?   That is exactly what it was, and I wasn't really sure what to think of it, but I'm not rude and I like to try new things so I tried it.  It is very simple, not overly sweet, and a nice cool treat, plus it's yummy.  Let me show you how simple it is :)

Ice Box Pie (via Cooks)
Ingredients
1 can Eagle brand condensed milk
1 8oz container cool whip
1 6oz can frozen lemonade
graham cracker crust (I used a store bought one)

Directions:
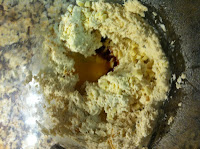
1)  Mix all ingredients except cool whip until well blended.

2)  Fold in cool whip and pour in graham crust

3)  Chill for at least one hour prior to serving.
front is pink lemonade and the back is limeade :)

So there you have it, a very easy dessert, perfect for if you need something in a pinch :)  Perfect for any holiday or family get together.

I know I said I was all done with all the Christmas recipes, but since this is a short post (sick day (also why you're getting this on Saturday), booo :( ) I thought I would share another favorite thing about Christmas since I started spending them with Nathan.
This beautiful tree full of white lights

On the way to the hanger or to Nathan's uncle, we always pass this cattle ranch, and in the middle of this vast field there stands a single tree.  Every single inch of it is covered in white lights, and on a cold winter night on the dark road it shines so bright it automatically brings a smile to your face.  Until next time.........


Stay sweet,


Jennifer xoxoxo


Friday, December 28, 2012

Straight From Granny's Kitchen

Hello Sweets,

How are you all doing post holiday?  Are you all baked out?  Are you turkeyed out?  Or are you just finally getting to put your feet up?  Nathan and I are just finally getting to put our feet up, and I think we both forgot how much running around there is to do with Christmas.  Wrapping presents was pretty hard for me because of my shoulders, so I listened to my body and wrapped in stages lol.  Overall it was a great Christmas and everyone was happy as they could be :)
 How cute is Berries the reindeer?!?

I have a recipe today that comes from Nathans granny, Dora.  She is a sweet lady, born and raised in Texas, and is full of all sorts of kitchen knowledge (aka other uses for cream of tartar) :).  So when she stopped in with a recipe from Nathans late grandfather for me to recreate, I was flattered and honored to carry the torch in the family.  The only thing I didn't use from the original recipe was the icing, which I was making later at night so opted for the icing I used for Nathans birthday cake (you can find it here), with another Canuckette twist of course.  So let me share this gem of a family recipe with you now :)

Dede's Chocolate Sheet Cake
Ingredients
2C all-purpose flour
2C sugar
1/2C shortening
1C water
4Tbs cocoa
2 beaten eggs
1 Tsp baking soda
1 Tsp vanilla
1 Tsp cinnamon
 
I will apologize in advanced for the lack of pictures, Nathans uncle was over my shoulder the ENTIRE time

Directions:
1)  In a large bowl; sift together sugar and flour.

2)  Mix shortening, water, and cocoa in a sauce pan, bringing to rapid boil.  

3)  Pour over the flour and sugar mixture and stir until well mixed.

4)  Add the remaining ingredients; eggs, baking soda, vanilla, and cinnamon and mix well.  Pour into a greased pan (large cake pan), I ended up using a cupcake tin instead and lined them with cupcake papers.

5)  Bake at 400F for 20 minutes, or until a toothpick inserted in the center comes out clean.  Let cool for 2 minutes, then transfer to a wire rack to cool.  Icing them once they are completely cooled.

*Side Note:  for the icing I added peppermint extract to give it a festive touch (use your taste buds for this part)*
 I ended up adding little candy cane sugar decals to make them even more festive :)

So there you have it, another family recipe passed down to the next generation.  What makes it even better is that I am getting them from both sides to create my own family recipes to share with my children :)

So now that the Christmas hoopla is finally over I can share with you the super fun gifts that I made for the ladies in the Texas family.  As you guys know I have a pretty kick ass pecan pie muffin recipe (click here). Well every time I make them, the family rants and raves about how tasty they are.  So I decided to make jars with all the dry, non perishable ingredients and completed it with the recipe written on a cute gingerbread man (add full recipe on the back).  I then finished it off with some festive ribbons, a silver bell, some fun Christmas stickers, and sticky tags to label for all the special someones.  I snapped a few pictures of the completed jar so you guys could see it for yourselves :)
   

The only road block I ran into was that the recipe calls for pecans to be added at the very end before placing into the oven, but thanks to Michael's, I got some festive zip lock bags that I placed on top and it filled the jars perfectly.  Now all the special family ladies in my life have the fabulous recipe for themselves always on hand, and they have a super cute recipe card now too!  I even had one extra left over so I decided to label it for Nathan, for when he misses me it'll be like I'm already there :)

So there you have it, all my Christmas recipes and super cute gifts, I hope you all enjoyed them as much as I did.  Tomorrow I will have a southern recipe to share with you and I will show you some of the super amazingly awesome kitchen gadgets I got from Nathans family, so don't forget to come back and check it out!  Until next time..........


Stay sweet,


Jennifer xoxoxo


Thursday, December 27, 2012

Jack Frost Nipping at Your Nose?

Hello Sweets,

Merry Christmas to all of my readers, from the great state of Texas!  I hope you all received some special kitchen tools from Santa, I know I did.  But more on that later, today was our first of two Christmas dinners and I would say it went off pretty much without a hitch.

Since I am writing this on Christmas eve (because even bloggers need a day off now and then) I thought I would keep it festive, so I saved one last holiday cookie recipe to share with all of you :)  I have some great memories from when I was a little girl and I am going to share one of those moments with you.  I come from Canada, and if you know your geography you know that no matter where you are in Canada, winter means snow, and a lot of it.  Well you knew where to find all the neighborhood kids when the snow started falling; outside enjoying the winter wonderland (although I no longer feel that way).  And when we finally were convinced to come inside every single part of us was frozen, sometimes even my mittens had icicles on them lol.  My grandmother would always make us hot cocoa with little tiny marshmallows in them, and it is a drink that I still enjoy today on a chilly night.  Well when I came across a recipe for hot cocoa cookies I couldn't pass them up!  Lets get to the warm gooey goodness that is this cookie :)

Hot Cocoa Cookies (via The Food Network Magazine)
Ingredients
2 1/4C cake flour, plus more for dusting
1/4C unsweetened Dutch-process cocoa powder
1 Tsp baking soda
1/4Tsp salt
1C butter, room temperature
3/4C sugar
1 large egg
1 Tsp vanilla extract
1/2C marshmallow cream
 

Directions:
1)  Sift the flour, cocoa powder, baking soda, and salt into a medium bowl.
 

2)  Beat the butter and sugar in a large bowl with a mixer on medium-high speed until light and fluffy, 3-5 minutes.
 

3)  Add the egg and vanilla and beat until incorporated.
 

 4)  Reduce the mixer speed to low; add the flour mixture in two batches and beat until just incorporated.
 

 5)  Divide the dough in half, wrap in plastic wrap and refrigerate until firm, at least 1 hour and up to 1 day.

6)  Line 2 baking sheets with parchment paper.  Working with one piece of dough at a time, dust the dough generously with flour and roll out between 2 pieces of parchment paper until about 1/8" thick.  Cut out shapes using 2 to 4 inch cookie cutters and transfer to the prepared baking sheets.  Gather the scraps and refrigerate until firm; re roll once to cut out more cookies.  Refrigerate the cutouts until firm, about 30 minutes.
 

 7)  Position the racks in the upper and lower thirds of the oven and preheat to 350F.  Bake the cookies, switching the position of the pans halfway through, until slightly puffed and darker around the edges, 12-15 minutes.  Let cool 5 minutes on the baking sheet, then transfer to racks to cool completely.  Sandwich the cookies with the marshmallow cream.
forgot to take a full picture, but don't these 2 look lovely :)

Well folks there it is, the final holiday cookie recipe I have for you.  Now that doesn't mean I won't be baking any goodies in the near future, have you heard me talk about my sweet toothed sweet heart??  Lol but who knows what Canuckette will bake next, heck I'm her and I don't know yet.  

I do want to warn you guys, I will have a couple of "technical" posts coming up. I just got a whole whack of fun kitchen toys from Nathans family and frankly I am SUPER excited to share with all of you :)  But I think my turkey tiredness is starting to kick in, so I will leave you with well wishes and a merry Christmas!  Until next time.......


Stay sweet,


Jennifer xoxoxo

Tuesday, December 25, 2012

It's Beginning To Look a Lot Like Christmas....In the Kitchen

Hello Sweets,

It's almost Christmas!!!!  Are you as excited as I am?  To be perfectly honest, I wasn't a huge fan of the Christmas season (personal reasons I'd prefer not to get in to), but Nathan has changed all of that for me.  The dynamic of his family, especially around the holidays is a prime example of family love and caring for one another.  Not to mention everything is better when I am with Nathan, lol ya ya I know I'm a mushy girl but hey I wouldn't have it any other way ;)

So today was my last day of baking, for a few days anyways, but I have baked so much in the last two weeks that I have a few recipes to get me through all the Christmas celebrations, plus I will finally get to tell you all about my super cute homemade gifts!  It's been hard to keep these fun gifts from all of you, because they really are very useful and I am extremely confident that everyone that is receiving will be very happy :)  So let me share the two recipes I made last night, because they are to yummy to wait any longer!

Pecan Shortbread (via The Food Network)
Ingredients
1 1/2C butter, room temperature
1C sugar
1 Tsp vanilla extract
1 Tsp almond extract
3 1/2C all-purpose flour
1/4Tsp salt
1 1/2C pecans, diced into small pieces
 

Directions:
1)  Preheat oven to 350F.  In the bowl of an electric mixer with the paddle attachment, mix together butter and sugar until just combined.

 2)  Add the vanilla and almond extracts.

3)  In a medium bowl; sift together flour and salt, then add them to the butter and sugar mixture.

4)  Add the pecans and mix on low speed until the dough starts to come together.  Dump onto a surface dusted with flour and shape into a flat disk.  Wrap in plastic and chill for 30 minutes.
 

5)  Roll the dough 1/2" thick and cut into 2 1/2" squares with a plain or fluted cutter (or into any shape  you desire).  Place them on an ungreased cookie sheet.  Bake for 20-25 minutes, or until the edges are golden brown.  Allow to cool to room temperature and serve. 
 

Okay everyone that was just the first half, now lets get to something a little more on the festive side shall we?

White Chocolate Peppermint Drops (via The Food Network Magazine)
Ingredients
6 ounces white chocolate, chopped
1 3/4C all-purpose flour
1/2Tsp baking powder
1/4Tsp salt
1/2C butter, room temperature
1/3C sugar
1 large egg
1 Tsp vanilla extract
4Tsp heavy cream
1-2 drops peppermint extract
1 candy cane or 6 hard peppermint candies, crushed roughly
  

Directions:
1)  Position racks in the upper and lower thirds of the oven and preheat to 350F.  Line 2 baking sheets with parchment paper.  Place one-third of the white chocolate in a small microwavable bowl; microwave in 30 second intervals, stirring until melted.  Set aside to cool slightly.  Whisk the flour, baking powder, and salt in a medium bowl. (sorry for the lack of photos)

2)  Beat the butter and sugar in a large bowl with a mixer on medium-high speed until light and fluffy, about 2 minutes.

3)  Beat in the melted white chocolate until smooth, then beat in the egg and vanilla.  Reduce the mixer speed to low; add the flour mixture in 2 batches and beat until combined.  Beat in half of the remaining chopped white chocolate. (again, sorry for the lack of photos)

4)  Roll heaping tablespoonfuls of dough into balls and arrange about 2" apart on the prepared baking sheets.
 

 5)  Bake the cookies, switching the position of the pans halfway through, until the edges are slightly golden, about 15 minutes.  Let cool for 3 minutes on the baking sheet, then transfer to a rack  to cool completely.

6)  Make the glaze:  Microwave the remaining chopped white chocolate (you can use the same bowl as before) in 30 second intervals, stirring, until melted. 

 7)  Stir in the heavy cream, and peppermint extract to taste. 
 

8)  Dip the tops of the cookies in the glaze and return to the rack.  Sprinkle with the crushed candy cane and let set, about 1 hour.
 

Well I hope you get a chance to try these delicious treats, because you won't regret it :) 

Well our Christmas celebrations start tomorrow, so I will be slightly busy but I will do my best to get some posts out to all of you (although, something tells me I'll need the break lol inside joke).  Merry Christmas faithful readers :)  Until next time..........


Stay sweet,


Jennifer xoxoxo


Wednesday, December 19, 2012

Baby You Make Me Do Pinwheels

Hello Sweets,

How is everyones Christmas celebrations going?  Are any of you already on holidays, kicking your feet up or rushing to finish your shopping?  I am pretty much done with the shopping part, though I do still have one more gift to get but after, that I'm done :)   As for the baking I am still in full gear, but I am giving sugar cookies a break to try some new recipes out!

I wasn't sure what recipe to do next, only because I have a few newbies I want to try, but then as I turned the page, the angels started sing lol.  Nathan loves cinnamon, so for today's post I have cinnamon pinwheels for you to try too.  This is a recipe that needs to sit in the fridge not once, but twice, the latter being a three hour minimum or overnight preferably, so you must have patience for this one :)

Cinnamon Pinwheels (via Food Network)
Ingredients
2C all-purpose flour
1/2Tsp baking powder
1/4Tsp salt
1 1/2 sticks(12Tbs) of butter, room temperature
2/3C granulated sugar
1 large egg
1/2Tsp vanilla extract
1/4Tsp cinnamon extract (optional)
1 Tsp unsweetened cocoa powder
3/4Tsp red food coloring
1 Tsp ground cinnamon
1 Tbs sanding sugar (clear or red) plus more for coating

Directions:
1)  Whisk the flour, baking powder, and salt together in a medium bowl.

2)  Beat the butter and sugar in a large bowl with a mixer on medium-high speed until light and fluffy, 3-5 minutes.
 

3)  Beat in the egg and vanilla until incorporated.  Reduce the mixer speed to low; add the flour mixture and beat until just combined.
 

4)  Remove half the dough and wrap in plastic wrap.  Add the cinnamon extract, cocoa powder, and food coloring to the remaining dough and beat until incorporated; wrap in plastic wrap.  Refrigerate both pieces of dough until firm; about one hour.
  

 5)  Dust the dough with flour and roll out each piece on parchment paper into a 10"x11" rectangle.  Flip the red dough on top of the plain dough; remove the top piece of parchment paper and trim the edges.  Sprinkle the ground cinnamon and sanding sugar on top.  Starting from a short end, tightly roll up the dough, using the parchment to help; roll the log in sanding sugar.  Wrap in plastic wrap and refrigerate until firm, at least 3 hours or overnight. (sorry about the lack of pictures :( )

6)  Position the racks in the upper and lower thirds of the oven and preheat to 350F.  Line 2 baking sheets with parchment.  Slice the log crosswise 1/4" thick; arrange the slices about 1 1/2" apart on the baking sheet.  Bake, switching the position of the pans halfway through until slightly puffed and lightly golden brown on the bottoms, 12-15 minutes.  Let cool 5 minutes on the baking sheet, then transfer to racks to cool.
 

These cookies embody both cinnamon and sugar cookies, and they look fantastic too!  It's a simple recipe to do.  I would say the hardest part would be the rolling of the doughs together, but the parchment paper is a big help with that :)

Now I do want to give all of you a heads up that tomorrow I will be baking the famous pecan pie muffins, so I will talk a bit about those, and also a tiny bit regarding my fun and fabulous gift that I am making.  Like I said before, I can't show or talk about the gift as a whole, but what I've decided to do is take "clue" pictures, and then after I have given them out (probably the 26th), I will do a post on the how to so you guys can do it too!!  Until next time........


Stay sweet,


Jennifer xoxoxoxo