Showing posts with label baking. Show all posts

Saturday, July 27, 2013

A Chip Off the Old Block

Hello Sweets,

I hope y'all are enjoying your weekend, and maybe even creating something delicious in your kitchens.  I had a lovely lunch date with my very good friend Miranda, and then we caught a movie; a horror movie that is.  We saw "The Conjuring" and it was actually pretty scary, which probably will come back to haunt me since I'm home alone :/  I'm pretty sure I'll be fine, but there were a few scenes that literally gave me goosebumps all over my body lol probably doesn't help that it's based on a true story.  But that's not why you stopped by today is it?  Today I am bringing you (insert silly drum roll), cookie number three!
 
old pic but still a goodie :)

Today's cookie was the one made for my brother in-law Jose (sorry can't figure out how to get an accent on the e), and he actually stole the cookie my sister wanted lol.  This is the kind of cookie my mom used to make for us as kids, actually it was pretty much her go to cookie lol.  Personally I like eating the raw dough (yes I know bad for me lol) more than the cooked cookie, can you guess what it is?  If you guessed chocolate chip you should reward yourself, perhaps with a cookie ;)  What I really enjoyed was the small amount of cocoa you put in additional to the chocolate chips, just gives it a little extra bit of chocolate love.

Gooiest Chocolate Chip Cookies (adapted from 1001 cookies and other treats)
Ingredients
1/2C butter, softened
  1 1/4C light brown sugar
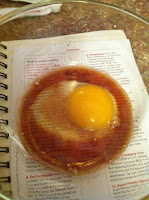
1 large egg, beaten
2Tsp vanilla
2C all-purpose flour
1Tbs cocoa
1Tsp baking soda
1Tsp salt
1 1/4C semi-sweet chocolate chips
1C milk chocolate chips


Directions:
1)  Preheat oven to 350F, lining 2 baking sheets with non stick parchment paper.  Place the butter and sugar in a large bowl and beat together until light and fluffy.

2)  Place the egg and vanilla in a separate bowl and whisk together, then gradually add to the butter mixture and beat until smooth.

3)  Mix in the flour, cocoa, baking soda, and salt until well combined.

4)  Add 3/4 of the chocolate chips (I mixed the two) and mix well (forgot to take a pic).  Spoon 6 heaping tbs of the batter on to each baking sheet, spacing well apart.  Top with remaining chocolate chips and press lightly.  Bake 15-17 minutes or until golden brown on the edges.  Cool on baking sheet for 5 minutes, then transfer to a wire rack.


There you have it, the "Jose" :)  I found that the dough can be a little dry, so I added 1-2 tbs of milk to add a little moisture and it worked perfectly!  So for those of you not keeping track, so far we have "JAM" and I saved the best cookie for last.  I'm not going to tell you guys too much about it, but what I will tell you is it's the perfect symbol for a wedding cookie.

And with that I will leave you in suspense, yea I know I do that a lot don't I?  Whatever I can do to keep my readers engaged, smiling, and of course, coming back for more.  Tonight I am going to continue a painting I started last night, and yes I will do a post about my newest passion soon I promise.  For now I will enjoy the soothing sound of the rain :)  Until next time...........................


Stay sweet,


Jennifer xoxoxo

Wednesday, July 24, 2013

The Unconventional Peanut Butter Cookie

Hello Sweets,

I know I've been a bad blogger lately as summer is a very distracting season for me, and for that I apologize.  I know I left you all in suspense because I only ever gave you one of the four cookie recipes, so what do you think you're getting today?  Yup another cookie recipe, and to be perfectly honest I have not baked many cookies since the wedding but that doesn't mean I've avoided the kitchen as a whole ;)  As I write this I am in Texas and it's Independence Day here (well it was when I started it lol), which means I prepared a few delicious holiday treats that I will be blogging about in the coming weeks!

So I know what you're thinking, how can a peanut butter cookie be unconventional?  Trust me when I say this was not what I was expecting when researching for a new recipe to try, but it is by far the best peanut butter cookie I have ever had!  Normally I have a go to recipe that is literally three ingredients.  It is a darn good cookie itself but it doesn't hold a candle to the recipe I'm going to share with you today :)  There is one specific ingredient in this recipe that really had me perplexed, but instead of sharing it now I'll wait until the end (always keeping you in suspense).

Peanut Butter Cookies
Ingredients
1/2C butter, softened
3/4C smooth peanut butter
heaping 1/2C superfine sugar
heaping 1/2C dark brown sugar
1 egg, lightly beaten
1 1/3C rolled oats
1/2tsp vanilla
1/2C all-purpose flour
1/2tsp baking soda
1/2tsp baking powder
pinch of salt


Directions:
1)  Preheat oven to 350F.  Grease 3 large baking sheets.  Place the butter and peanut butter in a bowl and beat together, then beat in sugars.

2)  Gradually beat in the egg and vanilla.  Sift the flour, baking soda, baking powder, and salt into the mixture.

3)  Add in the oats and stir until just combined.  Place spoonfuls of the dough onto the baking sheets, spaced well apart and flatten slightly with a fork.  Bake for 12 minutes or until lightly golden.

4)  Cool on a baking sheet for 2 minutes,, then transfer to a wire rack.

So did you guess what the unusual ingredients was?  If you guessed rolled oats, then you would be correct :)  I have never in my life come across a peanut butter cookie recipe with rolled oats, but needless to say this is now my go to recipe.  It's so good my sister (Asha, the bride) has dropped subtle hints that she really enjoyed them, lol unfortunately for her I am taking a small break from cookies and delving into some uncharted territories in the kitchen.

Do you want to know something?  It feels SUPER good to be blogging again, and I am feeling motivated to get back to doing it almost daily YAY!!  I also wanted to share with all my lovely readers that I have discovered a new passion that I eventually will share pictures and my progress in this new endeavor.  My newest passion is painting, no I am not professionally trained and even in school I took other forms of art but never painting.  The way I discovered my new passion was by attending a birthday celebration, after dinner we went to something called Painting with a Twist (it's only in the USA right now, hopefully they'll cross the border soon).  Needless to say I caught the creative painting bug, but I'll write a post dedicated to the experience because a few sentences just won't do them justice ;)  Until next time..............................


Stay sweet,


Jennifer xoxoxo

Saturday, January 19, 2013

Come Together Right Now, Over Food!

Hello Sweets,

I hope everyone is enjoying their weekend.  Are you staying in, or do you have all sorts of plans?  What have I been doing?  Well today was a write off (so glad I finished my creation last night), so I've been sleeping or resting, so that means I've done nothing lol but hey if that's what my body needs, I'm not going to argue.  Hopefully tomorrow I can get out to visit my grandparents and then I am hoping to make a chili from scratch (or close to it) for the first time, so wish me luck.  With the way the weather is here in the winter, warm comfort food is absolutely amazing!

Well tonight is the night that I finally reveal my original one of a kind creation :)  Did you guess what it could be?  So far the only clues I've given you is that there is candied bacon and a maple butter icing, so I think you've probably already got a pretty good idea what it could be.  If you guessed a "Canadian" inspired cupcake you would be dead on!  Now I will give fair warning that this cake recipe came out a little drier than I would have liked and it is dense (which could be part of it), but I think if I had pulled it out a couple minutes before it was completely set or used the cream that was called for (I used a kitchen trick with regular and butter), things may have worked out differently.  But that is all part of the process, now I know when I make this recipe again to try changing the measurements or ingredients to achieve what I am looking for :)  Let's get to the final part of the mini series!

Vanilla Cinnamon Cake
Ingredients
1C plus 2Tbs butter, softened
1 2/3C sugar
4 large eggs, room temperature
1Tsp vanilla
3C all-purpose flour
2 1/2Tsp baking powder
pinch of salt
2Tsp cinnamon
1 Tsp allspice
1C half and half cream

Directions:
1)  Preheat oven to 375F.  Line 24 muffin cups with cupcake papers (or you can make it into a cake as well).

2)  In a mixing bowl with an electric mixer, combine the butter and sugar.  Beat until light and fluffy, scraping the sides of the bowl to combine everything.

3)  Beat in the eggs and vanilla until smooth and well blended.

4)  In another bowl combine the flour, baking powder, salt, cinnamon, and allspice. 

5)  Stir the dry ingredients into the creamed mixture with the cream until blended.  Beat for 2 minutes.

6)  Fill the cupcake papers about 2/3 full.  Bake for 18 minutes, or until a toothpick inserted comes out clean (although I would pull out slightly sooner).  Cool in the pan for about 2 minutes, then remove and cool completely on a wire rack.

So there is the third and final recipe :)  I then decorated the cupcakes with the icing and candied bacon, and low and behold we have a Canuckette Canadian cupcake!

The flavors are a fantastic blend of salty and sweet up top, then the cupcake base is a play on french toast with the vanilla, cinnamon, and allspice.  

I can say that I am very proud of myself for taking my passion and not just tweaking someones recipe but taking an idea from my big ol' brain and creating it in the kitchen :)  I am definitely going to try and do this more often, because it gives me a great feeling of creativity and I take pride in everything I make, but knowing it's my very own is even better.

I encourage all of my readers, whether your passion is in the kitchen or somewhere else to push yourselves to do something original.  Of course there will be times where we don't succeed the exact way we intend, but as I always say it's a learning curve and you can only learn from the mistakes that are made.  Let me know what you think of my original recipe, and if you try let me know if you like it too!  Until next time.............


Stay sweet,


Jennifer xoxoxo

Sunday, December 30, 2012

A Breakfast Treat and Some Christmas Presents!

Hello Sweets,

I hope you all had a fantastic weekend, and that you are ready to ring in 2013!  Do any of you have special plans for New Years eve?  Nathan and I are opting for a romantic night for two in Fort Worth, maybe a candlelight dinner, some dancing, and of course champagne :)  I can't wait.  It will be a nice change from the crowded bar or dance, not to mention super romantic.

So today I thought I would change it up a little bit and do something a little different.  I'm not going as crazy as to not have a recipe included (that would be insane lol), but I am also going to do a product review on some new kitchen toys that I received at Christmas from Nathan's family that I used in the recipe I'm about to share with you :)  I am probably one of only a few women that is okay with kitchen products or appliances as a gift and not be upset about it, actually I'm usually ecstatic :)

As you all know, Nathan gave me a Kenmore Elite Mixer (details) that is AMAZING (not to mention great for my shoulders, he's the bestest), so I wanted to make something that really needed to be mixed.  Then it was like a light went off in my head, dough needs to not only be mixed but kneaded as well which is usually really hard on me, but not anymore!  So it was time for my cinnamon buns to make their debut once again. Since I was making dough I also got to use my new Betty Crocker non-stick rolling pin (details), and my Weston non-stick baking mat (details).   The mixer is phenomenal.  It came with 3 different attachments; 2 bowls (5 and 6 qt), it has a light to make it easier to see, it has a lift feature so you don't have to tip the bowl to get it out, has a timer that automatically stops after the time you set (super helpful for dough).  It is very powerful (I have yet to go past 3), and it is chrome so it goes nicely with everything.  The baking mat has a lot of great features besides the fact that it is non-stick, it can withstand both extreme cold and heat, it's microwave safe, and it has measurements on it for precision.  The rolling pin of course is non-stick, but it is also slightly longer than a traditional wooden rolling pin which helps simplify the production of any dough.  So my product review is this; I love all of these products and would recommend them to anyone who likes to bake or cook :)

 Isn't she pretty :)
 These work fantastic, even more so together!

 Okay enough of my Christmas goodies, lets get to the cinnamon rolls!!

Homemade Cinnamon Rolls
Ingredients
(Dough)
1 pk of yeast
1 Tbs sugar
6C flour
2Tsp salt
1 1/2C luke warm water
1/2C milk
Inside
2Tbs butter, melted
2/3C brown sugar, dark
1/2C pecans, chopped
1 Tsp cinnamon
Cream Cheese Icing
4Tbs butter, softened
3oz cream cheese
1 1/2C powdered sugar
1/2Tsp vanilla extract
1/8Tsp salt
  

Directions:
(Dough)
1)  Dissolve yeast and sugar in 1/2C of water, let stand for 5-10 minutes (it should double in size).
 

2)  Mix the flour and salt in a large bowl making a depression in the center.
 

3)  Combine milk, remaining water, and dissolved yeast and pour into depression.  Begin mixing flour with liquid making sure all the batter on side of the bowl is worked into dough.
 

4)  Knead until a smooth dough results and the sides of the bowl are clean.  Occasionally dip hands in water (I added small amounts in the mixer when it was dry) while kneading to give a smooth elastic finish.  Cover with towel and let rise in warm place for 2-4 hours.
look at the beautiful dough hook

Inside
1)  Roll dough into a rectangle about 18"x16".
 

2)  Brush with melted butter.  Combine sugar, cinnamon, and pecans and sprinkle over dough.
 

3)  Starting at the long end; roll dough tight as possible.  Moisten edges to seal, cut into approximately 20 pieces.  Place rolls cut side down into two lightly buttered round cake pans (rectangle works too!).  Let rise 1 1/2 hours until they double in size.
  

 4)  Preheat oven to 350F and bake for 25 minutes.

Icing
1)  Combine all ingredients in a mixing bowl until well blended.

2)  Frost cinnamon rolls with icing while rolls are still in the baking pan and enjoy!

These cinnamon rolls are to die for, and they are great for a family breakfast (I served Nathan his with a bowl of fresh fruit).  Plus, they're not too difficult to make.  This was actually my first experience activating yeast when I made them the first time and I can say I was impressed with myself :)

Well I am going to be honest with you, I may not have a post tomorrow night because of the celebrations, but I may try to write it during the day before we leave for our romantic evening.  If I don't post tomorrow I want to wish you all a very happy new years and hope you start your year off in a positive light.  Spend it with the ones you care most about :)  Also, thank you for all your support in my first year of blogging, I am looking forward to my first full year in 2013!  Until next time.........


Stay sweet,


Jennifer xoxoxo