Showing posts with label sweet. Show all posts

Monday, October 21, 2013

I'mmmmmm back...with muffins!

Hello Sweets,

Well I did it, I mustered up the energy to bake a little somethin' somethin' ;)   I honestly still don't feel too awesome, but my soul mate is coming in this week so I need to have some goodies made for him.  Yes I know I spoil him rotten but he does the same for me so I can't complain, but I wouldn't anyways because I love it, and him!!!!!

So the title of the post sort of gives away what I'm going to share with y'all, but it's delicious none the less so I'm sure you'll read all the way through :)   Here in good ol' Canadia, instead of Dunkin' donuts we have Tim Horton's!  They have delicious coffee and treats, and one of my favorite treats is there chocolate chip muffins. Now I know what you're thinking, what's so great about a chocolate chip muffin?  Normally nothing lol, but these are topped with coarse sugar that give it a little caramelized sweetness :)   So when I came across this little gem of a recipe, I knew I had to make them. 

Chocolate Chip Muffins
Ingredients
2c flour
3/4c mini chocolate chips (I may have added a little more lol)
1/2c sugar
1Tbs baking powder
1/2tsp salt
3/4c milk
1/3c coconut oil
1 large egg
2Tbs brown sugar
3Tbs coarse sugar


Directions:
1)  Preheat oven to 400F.  Spray muffin cups with non-stick cooking spray or line with paper. 

2)  Combine flour, chocolate chips, sugar, baking powder, and salt in a large bowl and mix well.
 

3)  Combine the milk, coconut oil, and egg in a medium bowl and mix well.
 

4)  Add milk mixture to flour mixture and stir until just moistened.  Fill cups 2/3 full.


5)  Combine remaining sugars in a small bowl and mix well.  Sprinkle on top of batter.


6)  Bake muffins until a toothpick inserted in the center comes out clean, about 20-25 minutes. Cool in pan for about a minute.
 

These little yummy treats are just what I was hoping for ;)  A delicious little snack, that's not to chocolaty or sweet.  They taste better than the Tim Horton's one, sorry Tim's lol.
 
an up close picture so you can see the texture created with coarse sugar

Now I have to plan some other little surprise for my love, but since he is my editor and reads my blog, I will not be able to share them with y'all.  Not right away anyways lol.  Maybe I'll do a mash up post while he's on the plane :) sneaky sneaky.  For now I have some household chores to get to :p  Until next time....


Stay sweet,


Jennifer xoxoxo

Saturday, August 24, 2013

Only Good Crumbs About

Hello Sweets,

So lately I have been having pretty "crumby" luck with my health, although I should never be surprised.  Which means my baking and cooking have been sporadic at least, but today is the first part of the very special dessert I made for Nathan for our jointly cooked dinner to celebrate our two year anniversary.  Normally if I asked Nathan what he'd prefer as our dessert he would request his favorite, coconut meringue pie.  However, for our anniversary he decided for something a little more unconventional........normally this is where I would tell you what it is, but I'm not lol.  That is for tomorrows post, until then we will lay the foundation for this tempting treat ;)

You know what some of my favorite commercials are focused on selling?  Oreo's, lol but seriously they're always cute little windows into the imagination of children.  The last one I saw was of two little boys, one of whom had just moved not only into the neighborhood but the country as well.  To the amazement of the other little boy, even though he was from half way around the globe he still knew how to eat Oreos the go to way for years (twist and dunk).  I personally am not a huge Oreo fan, that is until they brought out golden Oreo's with chocolate filling.  I have a serious addiction to those bad boys, to make matters worse I cannot for the life of me find them in Canadia, and this makes me very sad :(

Our anniversary dessert is chocolate based, no chocolate themed.  This was something new for me to make so  I had my challenges during construction, but now I know what to do differently next time.  For now we prepare the base and assembly will begin tomorrow :)

Oreo Cookie Crust
Ingredients
24 whole Oreo cookies, crushed into meal texture
1/4C butter, melted
 

Directions:
1)  In a medium sized bowl or food processor; add the Oreos and blend until it becomes the texture of coarse meal or crumbs.  I put them all in a freezer bag and smashed them to bits!  I guess you could say cheap therapy lol.
2)  Add the melted butter and blend until well combined.


 3)  Place the ground crumb mixture in to a 9" pie dish and press onto the bottom and sides evenly.  Try to make the crust about 1/8" thick evenly all the way around.  *If you find the mixture to be a little dry, just add a little bit more of butter*
 

4)  Refrigerate for at least one hour before continuing with your dessert, this will prevent cracking when you cut it :)
 
It was funny while we were walking through the grocery store Nathan said "you know they make pre made Oreo crusts right?".  That's when I turned around and said "yea, but they won't taste as good as a fresh one", not to mention I will be able to control the cracking easier.  Needless to say when the whole thing was put together he agreed that mine most likely did taste better, I already knew that but still love to hear it from him lol!

I wanted to share a sneak-peak photo from the date half of our anniversary celebration, Nathan took me on a sunrise flight over Texas.  Getting up at 6am is well worth it when you have the right company and a pretty view to look at ;)  Until next time.........................................................................
3

Thursday, August 15, 2013

A Little of This, A Lot of That!

Hello Sweets,

So after a really long sleep (ten hours) and a day of relaxing, I am still really sore and tired :(  I didn't expect to feel super and back to normal, but I definitely thought I would feel a little better.  It's unfortunate but I am used to this process, you'd think by now I'd be able to gauge what will hurt me and what won't.  Clearly I am not very good at that lol, but I made lots of lovely memories yesterday and that's all that matters to me.

Today's pie filling is a combination, I didn't have a lot of the main ingredient so when I came across this recipe it was absolutely perfect!  Let me see if this hint will help, what time of kiss do children love to do because of the sound it makes?  A raspberry lol!  My nephew does it all the time and he thinks it is just hilarious because it sounds so funny lol.  So our main star ingredient today is raspberries, but I didn't have enough to make a good fillings so I had to keep researching.  Then I came across a recipe that sounded so delicious to me, and it included one of my many favorite fruits.  That fruit is the one we used yesterday, nectarines!  The idea of raspberries and nectarines together sounded so good together that I didn't need to look any longer.  When I was little my grandmother used to grow raspberries and some other small fruits in her garden, I say hers because my grandfather's was the large vegetable garden.  It was fun at first, then the squirrels started stealing them before we could enjoy any and had to cover with mesh wire.  After that we had no problem ensuring we were able to enjoy them, and just like blueberries I just leave eating them by themselves.

Raspberry Nectarine Pie Filling
Ingredients
1C raspberries
1/4C nectarines, peeled, pitted, and thinly sliced
3Tbs sugar
2Tsp flour
 

Directions:
1)  Gently toss the fruit with the sugar and flour until they're evenly coated.
 

A lovely mixture of sweet and tart, add a heaping spoonful to your pastry cup and bake as directed in my previous post.  Allow to completely cool before enjoying :)
 

I know I've said it probably a million times now, but I really am happy and proud of how these tarts turned out.  Each flavor is distinctly different in their own way, some sweet and other more tart.  All of them delicious and filling enough that you don't have to eat more than one at a time.  Not to mention you don't feel guilty about eating them because they're very close to bite size!

I know this post is on the short side as well, but my migraine is making it very hard to concentrate :(  Well we have one last tart left to fill, now I've got to start thinking about what I want to make next, hmmmmm maybe something for dinner perhaps ;)  Until next time.......................................


Stay sweet,


Jennifer xoxoxoxo


Saturday, August 10, 2013

Sweeter Than Cherry Pie

Hello Sweets,

I hope y'all are enjoying your weekend, did you plan something fun and outdoorsy?  I was dog sitting for my sister and man are those dogs a handful!  Lol don't get me wrong I'm a lover of all fur babies, but try taking those two for a walk and it's a full blow production.  Pulling this way, rolling in grass over there, getting tangled up with each other, and trying to take their muzzle off :/  I would have taken them for a longer walk, but just going around two blocks had both my shoulders and patience worn down (I looked for a pic of them but I don't have one).  None the less I enjoyed some sunshine and that's what my doctors ordered :)

Today is the first in a series of six, of sweet and tiny posts :)  Yesterday's post on pie pastry was a little hint, along with tiny and sweet remarks as to what the next six posts would be about.  Have you guessed yet?  If you guessed mini pies then you, my dear reader, would be correct!  A few weeks ago I went to the farmers market with my grandparents, it's huge and full of vendors selling fresh fruits, vegetables, meat, and breads.  Being the single person (living situation that is) that I am I cannot eat everything I purchased all at once, so I froze portions of all the fruit to use later.
 pretty sweet haul right?

I love this time of year because there is an abundance of fresh fruit and TONS of local produce, I'm a big supporter of local if you can get it :)  Earlier this week I started craving pie lol, and me being the single person I am (damn I need my man at my side :( ) I thought it would be extremely wasteful to make a whole pie for myself.  Then I thought "well, what about a tiny pie?", and that just got me thinking of my wonderful frozen bounty :D  Anyone that knows me, knows I love EVERYTHING cherry.  Whether it's edible like pie, ice cream, or just in the simple and fresh way to even clothes.  Yup you read that right I have a cherry dress (it's one of only 3 made), tank top, earrings, a necklace, and at one point I even had slip on runners (sadly I wore them out).  Recently my mom handed me some clippings out of a magazine of even more cherry themed clothing, and take a gander at these babies;
 hey Nathan, need an idea for an anniversary gift lol *hint hint*

Yup I loooove cherries, so that is the first pie filling I decided to make.  Using the dough from yesterdays post I set out to make tiny open faced cherry pies.  This was the first time I've made cherry pie filling from scratch and it is unbelievably good, I probably won't use any other unless it's an even better version lol ;)  Anyways enough talk about shoes and grocery hauls, lets get to the sweet stuff!  *you will notice my batch is very small, this is because I cut it into 1/3*

Sweet Cherry Pie Filling
Ingredients
2C cherries, pitted and halved
1Tbs water
1/3C sugar
2Tbs cornstarch
1/2Tsp cinnamon
a teeny tiny bit of salt
1Tbs lime juice
 
*juice is because they were frozen*

Directions:
1)  In a medium saucepan; heat cherries and water over medium heat until they release their juice and soften (10 mins max).
 

2)  In a small bowl; whisk together dry ingredients.
 

3)  When the cherries are done, add the dry mixture into the pan and mix thoroughly to combine.  Heat, stirring constantly until the mix becomes thick and jam-like (2 mins).

4)  Remove from heat and stir in the lime juice.  Transfer to a container (plastic or mason jar), and let it cool in the fridge.
 
so much better than the canned stuff

To Assemble the Tiny Pies:
1)  Preheat oven to 325F.  Roll out your dough until it's about  1/2" thick.  Cut out circles, I used a coffee cup.
 

 2)  Spray muffin tins with cooking spray (I used olive oil, it worked like a charm!), drop the dough gently into the cups and gently mold it to the pan.  Add a spoonful of your mixture into each cup.
 

 3)  Place them in your pre heated oven and bake for 17 minutes, or until the pastry starts to turn a light golden brown.  Cool on wire rack, and enjoy!
 

As I am finishing this post I'm enjoying one of these bad boys :)  They're not overly sweet, the lime juice actually gives it a little bit of tartness to balance out the sugars.  The pastry is sturdy but not tough, it's actually very flaky and soft.  As you can tell by the second to last picture, there are many more flavors to come.  Over the next five days you'll get them all so y'all can try them out too!

I'm very proud of myself, as I feel as though now I have mastered pies and feel confident when making them.  Next on my radar will be butter tarts (I loooove them lol), or more delicate pastries.  Then again you know me I'm always trying many different things, who knows what will intrigue me next :)  Until next time...............................


Stay sweet,


Jennifer xoxoxoxo

Tuesday, April 9, 2013

Completely Canadian and A Shameless Plug

Hello Sweets,

So the weekend has come to an end :(  I hope everyone got out to enjoy some sunshine (if you had some), and created something delicious in the kitchen.  My post tonight is going to be somewhat shorter as I have had a long day and am feeling sort of tired, but I reconnected with an old friend so I think it was worth it!

Let me first start with the "shameless plug" lol because I am SUPER excited, like if there were any other way to emphasize the word super more I am pretty sure I would have done that too.  So as you may or may not be aware I had the opportunity a year ago to not only reconnect with an old friend, but I also got see her in her element (with me as the focus) in her element photography.  Echo is very talented and has a knack for catching the perfect moment and seeing the beauty in everything, I have my favorites but there is one that she caught with my natural smile in a laugh and it is just beautiful.  Well she is currently running a contest for a free natural light session and obviously I entered, not just so I could have another opportunity to work with her but so I could also have professional photos of me and my best friend/soul mate Nathan.  I normally wouldn't include something like this in my blog as it isn't any way associated with food, but so want to have our silliness captured by a true artist.  All you would have to do is click this LINK, like my photo (it's the only couple photo on there) and like the Facebook page it's posted on (CLICK HERE).  The contest is only running for one week so time is of the essence, and I will post some of the photos (if I win) here on my blog for everyone to see what they helped me achieve :)   Also if you would like to use her services or see her amazing portfolio just check out her website; Echo's Visuals.  I would appreciate any help and support y'all can give as it would make me a very happy girl.

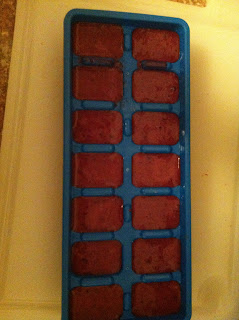
Okay enough of my selfish plug let's get to what you really come here for, deliciousness!  So last week I was craving fruit much more than normal, so I went out and bought a few things, well too many for one girl to consume before they go bad (must have been hungry when I went lol).  So I started to realize I was going to throw money away if I didn't come up with something quick.  Then it dawned on me, I've been eating popsicles like they're going out of style and drinking ginger ale (haven't been feeling well).  What better way to ensure I use the fruit, get some vitamins and minerals in me, and spice up my beverage?  If you get fruit cubes then you my friend are a smarty and deserve recognition for that!  Now I know it seems like I would have opted to make popsicles and who said I haven't, yes you'll need to come back again for that little treasure (ya I know I'm demanding).  There is really no easy way to explain them without pictures so let's get to the good stuff :)


Canuckette's Fruity Cubes
Ingredients:
blueberries
blackberries
orange juice


Directions:
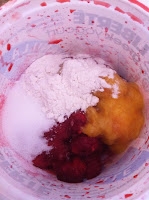
1)  Combine all ingredients in a blender, blending until the fruit is completely liquefied (I have a bullet and it was perfect).


2)   Pour the mixture into an ice cube tray and place in the freezer to set.

3)  Once completely frozen place in a glass, pour the ginger ale over top of them (soda water would work too I suppose) and enjoy!

It gives the soda just a little zing, and most importantly, it tastes amazing!

So there you have it, short and sweet ;) pun intended.  I also appreciate y'alls support and understanding over the sporadic posts, I have the best readers.  And if you decided to check out the contest I'm in and end up voting I appreciate that immensely as well.

Stay sweet,


Jennifer xoxoxo


Sunday, January 27, 2013

A "Corny" Sweet Success!

Hello Sweets,

I hope you all had a wonderful weekend, and spent today relaxing on the final day of the weekend :(  My weekend was not too bad, health wasn't a complete blockade (yay for small triumphs lol) and I went right back into the kitchen to create some things I've been  envisioning in my head for what seems like days now.  Now the one thing that my weekend did lack was sleep, and I don't mean only got a few hours or was restless, but actually have only gotten about 7 hours since Thursday night O_O.  Needless to say that today I am a goofy, giggling, zombie just trying to push on through with hopes of a full night sleep tonight (fingers crossed).  Now I am sure you're all wondering why I didn't have a cat nap this afternoon, and the reason is because I made plans to see my grandparents and hate breaking promises to them.  We needed to have a little quality catch up :)  Then when I got home I had to create my final recipe of the "chili" chapters (damn should have thought of that with the first post, lol oh well), and now it's dinner time and I'm afraid that if I fall asleep now I'll awake in the middle of the night lol.

So I am sure you've all been speculating on what the final chapter is, and I've got a pretty good idea that the title may have cemented your guesses :).  If you guessed cornbread you're the grand prize winner...........of the guessing game lol your big prize is my thanks and a smile!  Now I've eaten chili all my life, cornbread however is fairly new to me as it is not common at all where I am from, but that doesn't mean I had never tried it, but when I had it for the first time at Nathan's house I really fell in love with that starchy little devil.  Contrary to what I've had at home, Texas cornbread is moist, sweeter, and has great texture (drools).  When Nathan's dad made chili for us right before I went home, I offered to make some from scratch (they use a box, fore shame!) but he was worried it wouldn't be sweet enough, so in the words of Barney Stinson (How I Met Your Mother - TV series) "Challenge Accepted!".  From then on I've had this burning determination to find the perfect recipe for scrumptious cornbread, and then I stumbled upon a fabulous little web site (obviously a fellow kitchen creator) called A Sweet Pea Chef (love the title too) and there was the start of my great cornbread :)  So I drew inspiration from her recipe and made a few "Canuckette adjustments", to make exactly what I was looking for.  And now I'm going to share it with all of you!

Canuckette's Sweet Cornbread (inspired from A Sweet Pea Chef)
Ingredients
1C all-purpose flour
1C cornmeal, yellow
1/2C granulated sugar
2 1/2Tsp baking powder
1 Tbs brown sugar, dark and heaping
1 Tsp salt
1 egg
1C half and half (the lightest you can find, mine was 50% less fat than original)
1/3C vegetable oil
1/2C creamed corn
3Tbs honey, melted (give or take)


Directions:
1)  Preheat the oven to 400F, and grease (I used coconut oil, so no flour was needed) either a 9" round cake pan or a 12 cup muffin tin.

2)  Combine all dry ingredients (flour, cornmeal, both sugars, baking powder, and salt) in to a large bowl and set aside.

3)  In a separate smaller bowl, combine all the wet ingredients (egg, cream, oil, creamed corn but not the honey).
   
crazy looking layers lol

4)  Add the wet ingredients to the dry ingredients and mix thoroughly, but be careful not to over mix.  Drizzle the melted honey over top of the batter, doing your best to evenly distribute.


This was when I decided to add the honey for a little bit of sweetness on top :)
  
5)  Bake for 20 minutes, or until a toothpick inserted in the center comes out clean.
   
yummers!!

I'm so glad I foraged down this road, specifically because I am not sure how much more I can improve on this recipe, it's honestly that good!  Normally I don't like to toot my own horn, but TOOT TOOT lol.  If you love or even like cornbread then you definitely need to try this recipe, and if you aren't sure if you will like it try this recipe because it's the best I've come across yet!

Well I can barely keep my eyes open as I  finish up this post lol.  That last paragraph took me almost 15 minutes to write because my mind was trying to shut down lol, so it looks like I may be going down for a cat nap after all, and hopefully not all night.  Make sure to come back tomorrow for a simple and refreshing way to forget we are in the middle of winter (if only for a moment).  Until next time..................................


Stay sweet,


Jennifer xoxoxo


Wednesday, January 16, 2013

Candied Bacon, Need I Say More?

Hello Sweets,

Well you've made it to the middle of the week :) in a couple of days it will be the weekend again!  Do you have any fun plans considering the unseasonable weather (my Ontario friends)?  So far for me it sounds like it will be a nice quiet weekend, maybe a visit with my favorite little man Miguel (my nephew), which is always a blast.

Lately I've been feeling very blah -_- and frankly I don't like it, so today I decided to get back to my passion and create a recipe from scratch :)  Over the next three posts I will be doing one recipe (three total) and on the final post you'll be able to see the final product.  Now I won't be telling you what I'm making now, but I'm going to treat it sort of like a puzzle :)  With each recipe I want you guys to try and guess as to what is being put together, and I am sure you'll be in the right ball park once you have tomorrows post to combined with today's.  If you think you know what I am making please leave a comment below, I love hearing from all of my lovely readers.

So I know the title of the post tells you exactly what I made today, but honestly what more can I really say about candied bacon lol.  I had never made this before, but since I wanted a completely original Canuckette recipe, I decided to try my hand at it.  I did a little research since I knew I'd be making it in the oven, which is completely foreign to me lol.  I still make bacon the old fashion way  in the frying pan.  Do you ever find that when you think it's an easy straight forward recipe, then you look online for some basics and it seems like everyone does it completely different, and with random ingredients?  Well that is how I felt lol but I felt confident that I had the general knowledge to move forward in my quest, so I went ahead with it and now you will too ;)

Canuckette's Candied Bacon
Ingredients
bacon
dark brown sugar
cinnamon
black pepper
allspice
 
the allspice was a last minute addition, and a good one at that!

Directions:
1)  Preheat oven to 325F.  Line a baking pan with tinfoil (sugar drippings are very hard to clean of a pan), place a wire rack on top and spray very well with cooking spray.  Line bacon across the wire rack.
 

2)  Sprinkle a pinch of pepper and allspice over top, then lightly dust with cinnamon.  Completely coat with brown sugar, make sure to press down to get the sugar to stick and not fall off when you flip to do the other side.  Flip over and repeat.

3)  Place in the preheated oven and bake for about 30 minutes, or until the bacon is a darker brown.  Remove from oven and move to a plate to cool.

4)  Cut into smaller pieces and enjoy on top of many dishes or as a small snack!
the sugar gives it a shimmery look

I am so glad I finally made this (thanks for putting the idea in my head Dave!) because it is the perfect balance of salty and sweet.  Let's just say that everyone who has tried it thinks it's delicious :)

It is killing me to not share the surprise of the final delicious treat, but the mystery is half of the fun right?!  Now I have to go do some more research for tomorrows recipe because I will be giving you yet another Canuckette original, and I am super excited.  What I will tell you is that I'll be utilizing my Canadian roots with tomorrows creation ;)  I am also glad to report that in the time it took to write this post I am already feeling a little better :)  Until next time...............


Stay sweet,


Jennifer xoxoxo