Showing posts with label healthy. Show all posts

Monday, March 3, 2014

A Little Bananas

Hello Sweets,

So as I promised yesterday I have the full flavor review of the S'more or Less muffins :), and they are even better than I could have imagined!!  What would have been just ordinary vanilla cake is anything but.  It takes on the flavor of the graham cookies all while staying soft and moist.  The chocolate cake is the perfect flavor, not too sweet but not dry either.  The marshmallow gives the muffin a touch of sweetness, but it also has the flavor of a roasted marshmallow too.  All in all these are a great muffin, and have officially made it in to my personal recipe book :)  Many a nights have been spent jotting down recipes to keep or try, and my hand can attest to that lol.

I am definitely paying for doing all the tax returns yesterday, my shoulders and neck are killing me.  The sad part was I didn't even notice how much time had gone by, because I was so engrossed in the task.  But how many people can say they have their taxes complete by March 2nd?  If I had to guess, not very many at all :D  Now I can sit back and relax while everyone else is stressing, lol yea that sounds perfect.

Today I am bringing something completely different and new.  Something that is sweet, but healthy at the same time.  Yup sweet and healthy, consider your mind blown *boom*.  I haven't been feeling well all day :(, so naturally I didn't feel like making anything for y'all today.  However I had some bananas that were starting to become too ripe, so I had to figure out a way to use them.  Normally I would just make my grandmas banana bread, but then I remembered something I love but haven't had in quite some time ;)

Banana Chips
Ingredients
3 ripe bananas (green ones make crisper chips faster, and ripe ones make sweeter ones)
1tsp nutmeg
pinch of salt
honey, to drizzle
 

Directions:
1)  Preheat oven to 250F.  Line a baking sheet with parchment paper (to prevent sticking and easy clean up), set aside.
2)  Slice your bananas into thin slices, not too thin or they become limp.


3)  Line bananas in a single layer on the prepared baking sheets.
 

4)  Sprinkle with salt and nutmeg.  Place into preheated oven for 2 hours, flipping (as much as possible) after about 90 minutes.
 

not as pretty as store bought, but I know everything that goes into them ;)
5)  Remove from oven and cool on wire rack.  Store in an airtight container and enjoy! 

What a great and healthy option when you feel like a sweet snack.  Kids and adults alike would love these little chips, and you can even use them as a decorative final touch on a banana cupcake.  I would think that even picky eaters would love these little chips.  It never ceases to amaze me when I haven't tried to make something I actually enjoy eating.  I'm just a silly girl I guess, who is a little spacy at times in the kitchen :p
As I am finishing up this post my stomach is starting to really hurt, which means I need to lay down and relax for a little while.  Don't worry I'll make sure to be back with something yummy tomorrow, unless this doesn't stop.  But I'm not going to think like that, I'm going to try and stay positive :)  Until next time....
Stay sweet,


Jennifer xoxoxo


Sunday, September 29, 2013

Fall Hauls!

Hello Sweets,

The weekend is over :( for y'all anyways lol!  You know me being off work and such makes everyday a weekend, which gets old real fast.  It seems like a lovely idea to lead the life of a cat ;) but in reality it gets boring quick, unless you're a cat then it's okay lol.  Today was a very productive day for me :)  I started my day off right by going to church, it was nice to see my pastor again although he asked where I had been :/ (I know bad girl)  It was okay though, they are well aware of my health issues and were just happy to see me again :)  Then Heather and I finally caught up!!  I told you I felt good about today lol, we completely lost track of time and were chatting for 2 1/2 hours.  We did a fun little trade, I gave her baked goods and she gave me board games win win!!

When I finally did make it home I realized, "hey what about the muffins I was going to make?".  So I looked at a couple different recipes and decided I was going to make my own.  I did that because I couldn't find something close enough to what I wanted, later this week I may make my spicy pear muffins because they are super yummy!  Now that it's getting chilly outside I am all about warm spices and fall hauls :)  Anyone who lives/lived in Ontario knows what September brings, an abundance of apples and pears!!  Two of my very favorite fruits, especially to bake with ;)

Spicy Apple and Pear Muffins
Ingredients
1/2C apple, diced
1/2C pear, diced
1/3C applesauce
3/4C milk (if you use skim it make the recipe fat free!)
1/2tsp salt
1 1/2tsp baking powder
1/3C sugar
1 3/4C all-purpose flour
1/4tsp ground ginger
1/2tsp cinnamon
1/2tsp allspice
(I pre-seasoned the fruit a little before with extra)
 

Directions:
1)  Preheat oven to 375F, greasing a muffin tin.  Mix together in a large bowl; sugar, cinnamon, ginger, and allspice.
 

2)  Add the flour, baking powder, salt, milk, and applesauce to the sugar mixture.  Do not over beat.
 

3)  Stir in the diced apples and pears.
 

4)  Spoon batter into the greased muffin cups.  Bake for 20 minutes, or until tops spring back when lightly pressed.
 

5)  Serve after muffins have cooled a bit, about 20 minutes.


(I did a double batch, that's why there's so many)

Right now my whole house smells like delicious fall baking, the smell is very close to apple pie :)  These muffins are smaller and dense, but you definitely only need one to curb your hunger.  I like the combination of the apples and pears together, they mesh really well and each bring there own dynamic to the muffin.  The apple is a little more tart so the pear gives it a little sweetness, I personally prefer fruit muffins because I like the moistness they give.

I know this post is a little short but my shoulder is all of a sudden screaming at me :(  Guess that's all I can give y'all tonight, but hey something is better than nothing right?  Until next time....


Stay sweet,


Jennifer xoxoxoxo


Tuesday, August 6, 2013

Save the Date....for Cake!!

Hello Sweets,

I am very happy and excited to say I've had a wonderful day :D  I was worrying about somethings, but today I found out that everything will be just peachy keen and therefore I'm a happy camper.  I should have just listened to Nathan because he kept reassuring me that everything would work out, he's usually right about the things that worry me (although let's keep that between you and I ;) ).  I still have an ear to ear smile from being relieved *cue happy dance*

When I was growing up my grandmother would sometimes make date squares around the holidays, then my mom and I made a HUGE batch from Christmas a few years back.  I was craving them a few weeks ago and I decided I wanted to give them a go, thus the research began.  I only had raisins in the house and since I'm on a budget I decided they would be just as good.  I came across a recipe that looked pretty tasty (but I can't remember where I got it), and knew it would be a big hit.  A big reason I love to bake is to provide my nephew with some yummy treats, and since raisins are one of his favorites I knew this would be a hit for his little tummy.  During my research I discovered that date squares are what some Canadians call it, to the rest of the world it's called matrimonial cake.  It's not cake like at all, and I personally would not want this for my wedding dessert lol.  Don't get me wrong it's tasty, but it will never replace an actual cake.

Matrimonial Cake (aka Date Squares)
Ingredients
filling;
1 1/2C raisins (or dates)
3/4C sugar
rind of 1 orange, grated
1 1/2C boiling water (of half OJ and half water)
top/bottom;
1C butter, softened
1 + 1/4C brown sugar
1 + 1/2C all purpose flour
1Tsp baking powder
1/2Tsp salt
1 + 1/2C rolled oats
 

Directions:
1)  Preheat oven to 325F.  Put the raisins (or dates), rind, sugar, and boiling water into a saucepan and gently cook until it becomes a jam-like consistency.
 

2)  In a mixing bowl; cream together the butter and sugar.  

 
I accidentally melted the butter :(

3)  Then add the rest of the dry ingredients, mixing until crumbly.
 

4)  Pat half of the oat mixture into the bottom of a buttered 9" square pan.  Spread the date mixture over the base, then cover with the remainder of the oat mixture.  Bake for 45 minutes.

These are soft and chewy, and not sweet at all but I find them very filling so a small piece should do just fine.  Miguel loved them so much that I ended up sending a second little batch over with my sister, I can't say no to his little dimples!  This was the first time I've made them with raisins and I actually prefer them this way, it's a milder flavor than the dates can be sometimes.  But I still say this is not a cake or a wedding cake!!!

For a change tomorrow I will be posting a recipe that is gluten and processed sugar free O_O  It's not something I would normally make for myself but I did a trade with my mother and that's what she requested.  I did try what I made and it wasn't bad, but alas I am a flour junkie so it just wasn't the same to me.  I've also been toying with the idea of making tiny fruit tarts, but not sure what or how yet just another thought rolling around in my big ol' brain lol.  Until next time.....................................


Stay sweet,


Jennifer xoxoxoxo


Sunday, May 5, 2013

Now Socially Acceptable!

Hello Sweets,

Spring is finally here!!!!!!!! Yes us Canadians have to wait longer than the rest of you to enjoy the nicer weather, but it has been fabulous and warm out so I couldn't be happier :)  Well actually I can, but until Nathan and I are reunited I will have to settle for sunshine only.  I took a walk the other night (no more treadmill for this girl) and I caught myself smiling because the weather was perfect and the smell of fresh cut grass assures me it's here to stay *happy dance*.

We've actually been fortunate enough to has some amazing summer like weather, weather just like Texas, which makes me miss my love but the warmer the weather the happier I get :D  Oddly enough our weather in good old Canadia has been warmer then Texas O_o but hey I'll take it!  So since it's been so warm I decided to make some more...............Canucksicles!!!!!!!  Yes that's right I made more but in a new flavor, which means a short but sweet post for a sleepy Sunday :)  But don't worry I've got some wonderfully delicious treats for you this week, I actually had a day where I was feeling especially creative and made a few different treats (this is where the cancuksicles were revamped), and I even spiced up one of my favorite dinner meals which is also the first full meal I had ever made at the rip old age of 12!  So as you can see my love of food started young and just kept growing into the passion I have today, let's get to the sweet stuff shall we?

Canucksicles #2
Ingredients
1 1/4C strawberries, quartered
1 banana, sliced
1/2C orange juice
1/3C yogurt (orange juice)

Directions:
1)  Chop up all your fruit into small manageable pieces for your bullet or blender.

2)  Place into the blender with the orange juice, blend just slightly before adding the yogurt.

3)  Add the yogurt and blend until completely liquefied, pour into your popsicle molds and put into the freezer to set.
 

So as you can see you can make popsicles with what ever you choose, I am actually toying with a green popsicle lol yup but I can't tell you what my secret ingredients are until it's complete :)  Be inventive and creative and most importantly don't be afraid to try something new and unusual.

So I know it's a short post today but it's Sunday and I have a day full of family, friends, and laughter so I think you guys will be okay with a short one :)  I hope everyone enjoys their Sunday whether you're relaxing with your feet up, or outside getting active with your loved ones!  Until next time..........................


Stay sweet,


Jennifer xoxoxo

Wednesday, April 24, 2013

One Thing A Canadian Knows.......

Hello Sweets,

I've been away for far too long :( and I feel awful about it, but trying to keep my health and pain at a manageable level can be difficult. I am back on Canadian soil after spending a week with my love and his family just relaxing and taking care of myself and I am ready to get back to writing (again). Since I still have some completed recipes that I haven't written about, I'm diving into the Canuckette vault of goodies!

So what is one thing a Canadian knows for sure? Anything cold! Considering it's almost the end of April you'd expect to see April showers right? Well you could imagine the shock on my face when I saw snow falling from the sky this afternoon, ugh not a happy girl. Although I am Canadian, I absolutely hate, and I mean hate, cold weather lol I know I'm a terrible Canadian. However I do love Popsicles all year round.  No matter what the weather is doing, I still want my Popsicles. It is one of my go-to foods when I'm not feeling well.  Then it dawned on me, I could make Popsicles that would help me get some vitamins and other goodness in me even when I don't feel like eating at all. Previously I brought you "Canuckette's fruity cubes" and now I'm bringing you Canucksicles!!! There simple, easy, and most importantly they are tasty :)

Canucksicles
Ingredients
Orange juice
Yogurt (whatever flavor or type you prefer)
Blackberries
Blueberries
Strawberries
Pineapple


Directions:
1) Combine all ingredients into a blend or magic bullet.

2) Puree the mixture until it is completely liquefied. Then transfer it into a Popsicle mold and place in the freezer to set.

You can change up everything in this recipe; the juice you use, the fruits, and even the yogurt. If you're feeling extremely adventurous try throwing in some veggies, as long as you balance it with a sweeter fruit (like bananas) you most likely won't even notice, better yet, the kids won't!
 Yum!

I know this post was short but I wanted to ease myself back into the swing of writing and relight my passion and get back to the basics. The good news..... I'm on my way there :)

Stay sweet,


Jennifer xoxo

Tuesday, April 9, 2013

Completely Canadian and A Shameless Plug

Hello Sweets,

So the weekend has come to an end :(  I hope everyone got out to enjoy some sunshine (if you had some), and created something delicious in the kitchen.  My post tonight is going to be somewhat shorter as I have had a long day and am feeling sort of tired, but I reconnected with an old friend so I think it was worth it!

Let me first start with the "shameless plug" lol because I am SUPER excited, like if there were any other way to emphasize the word super more I am pretty sure I would have done that too.  So as you may or may not be aware I had the opportunity a year ago to not only reconnect with an old friend, but I also got see her in her element (with me as the focus) in her element photography.  Echo is very talented and has a knack for catching the perfect moment and seeing the beauty in everything, I have my favorites but there is one that she caught with my natural smile in a laugh and it is just beautiful.  Well she is currently running a contest for a free natural light session and obviously I entered, not just so I could have another opportunity to work with her but so I could also have professional photos of me and my best friend/soul mate Nathan.  I normally wouldn't include something like this in my blog as it isn't any way associated with food, but so want to have our silliness captured by a true artist.  All you would have to do is click this LINK, like my photo (it's the only couple photo on there) and like the Facebook page it's posted on (CLICK HERE).  The contest is only running for one week so time is of the essence, and I will post some of the photos (if I win) here on my blog for everyone to see what they helped me achieve :)   Also if you would like to use her services or see her amazing portfolio just check out her website; Echo's Visuals.  I would appreciate any help and support y'all can give as it would make me a very happy girl.

Okay enough of my selfish plug let's get to what you really come here for, deliciousness!  So last week I was craving fruit much more than normal, so I went out and bought a few things, well too many for one girl to consume before they go bad (must have been hungry when I went lol).  So I started to realize I was going to throw money away if I didn't come up with something quick.  Then it dawned on me, I've been eating popsicles like they're going out of style and drinking ginger ale (haven't been feeling well).  What better way to ensure I use the fruit, get some vitamins and minerals in me, and spice up my beverage?  If you get fruit cubes then you my friend are a smarty and deserve recognition for that!  Now I know it seems like I would have opted to make popsicles and who said I haven't, yes you'll need to come back again for that little treasure (ya I know I'm demanding).  There is really no easy way to explain them without pictures so let's get to the good stuff :)


Canuckette's Fruity Cubes
Ingredients:
blueberries
blackberries
orange juice


Directions:
1)  Combine all ingredients in a blender, blending until the fruit is completely liquefied (I have a bullet and it was perfect).


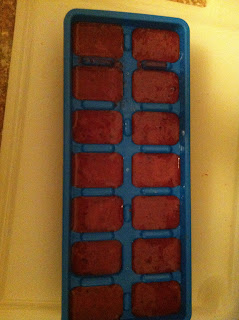
2)   Pour the mixture into an ice cube tray and place in the freezer to set.

3)  Once completely frozen place in a glass, pour the ginger ale over top of them (soda water would work too I suppose) and enjoy!

It gives the soda just a little zing, and most importantly, it tastes amazing!

So there you have it, short and sweet ;) pun intended.  I also appreciate y'alls support and understanding over the sporadic posts, I have the best readers.  And if you decided to check out the contest I'm in and end up voting I appreciate that immensely as well.

Stay sweet,


Jennifer xoxoxo


Wednesday, February 27, 2013

Eh, What's Up Doc?

Hello Sweets,

You've made it to the middle of the week :) and now I'm sure most of you are counting down the days until the weekend right?  I'm honestly excited for tomorrow, and I am sure you are thinking to yourself what's so special about Thursday?  Well firstly it's the night a new episode of The Big Bang Theory is shown, secondly when I'm in Texas on a Thursday it's steak night (YUM!!) and when it's Nathan behind the grill it's guaranteed deliciousness, and thirdly I'm getting a hair cut!!  I know normally a hair cut is nothing big, but it's been well over a year since I've had a haircut and I am so over due that I am trusting the good reviewers on Yelp to help me find a fantastic salon here in Texas, and most girls will tell you trying a hairdresser you know nothing about can be kind of scary, so send positive vibes for me tomorrow :)

Any who, you guys don't come here for tales of new hair adventures, but you do come for good eats and that is exactly what I have for you today, I'm actually spoiling you with two recipes instead of just one (I love you guys that much!).  I'm not sure if you remember but a few weeks ago I was talking about doing some posts about revamped food from our childhood, only problem was I never got around to it :(   But today I am bringing you a recipe that I used to have all the time as a child, but with a sweet little twist to it.  I even brought it to a luncheon I had that same week and needless to say there wasn't anything to bring home, but the best part was no one could put their finger on what the mystery ingredient and when I told them they were pleasantly surprised.  Now enough talk, lets get you in the kitchen and creating with another great recipe inspired by the wonderful app AllRecipes (seriously if you haven't gotten it yet you really should).

Carrot Pineapple Cake
Ingredients
 2C all-purpose flour
2Tsp baking soda
1 Tsp baking powder
1 Tsp salt
2Tsp cinnamon
1 3/4C sugar
1C extra virgin olive oil
3 eggs
1 Tsp vanilla extract
2C carrots, shredded
1C coconut, shredded
1C pecans, chopped
1C pineapple, crushed and drained

Directions:
1)  Preheat oven to  350F.  Grease a 9"x13" baking pan and set aside.  Mix flour, baking soda, baking powder, salt, and cinnamon.
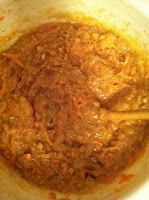
 2)  Make a well in the center and add sugar, oil, eggs, and vanilla.  Mix with wooden spoon until smooth.
the well was over"whelmed" lol

3)  Stir in carrots, coconut, pecans, and pineapple.

4)   Pour into baking pan and bake for about 45 minutes, or until a toothpick inserted into the center comes out clean.  Don't panic as the center will sink slightly.  Allow to cool before icing.

Cinnamon Coconut Cream Cheese Icing
Ingredients
8oz cream cheese
1/4C butter, softened
2C powdered sugar
1 Tsp cinnamon
dash of allspice
1/2C pecans, chopped
cinnamon and allspice not pictured :/

Directions:
1)  Cream the butter and cream cheese together until smooth.  Add the spices and icing sugar and beat until creamy.

2)  Ice the cake and top with the chopped pecans.
Forgot to take a pic and only this tiny piece remained

This is very moist and has a wonderful sweetness that is created by the pineapple.  I like carrot cake, but I don't think regular carrot cake will cut it anymore, lol.  This is definitely a keeper and will be made again.  If you decided to make it you can change (or even omit) the nuts, and play with the spices a little I didn't follow the measurements to a t, but that is just how I bake :)

So there you have it, the final recipe that was waiting to be published, and it's good timing too, because when I'm here in Texas I do nothing but spoil my sweetheart with sweet and delectable treats ;)  Tomorrow I think I will blog about our dinner, he is making the steak and I am in charge of the veggies so it is a joint meal, and maybe I can even get him to write a little about his marinating techniques if we're lucky!  And be on the lookout for a delicious chocolate peanut butter duet that is sure to be a hit, I say that because as soon as I saw the idea I had to make it a reality.  Until next time............


Stay sweet,


Jennifer xoxoxo

Saturday, February 23, 2013

A Twist On Something Old

Hello Sweets,

I'mmmmmmmmmmmm backkkkkkkkkkk!!!  I know I know, it's been forever since I wrote a post. Well okay, almost two weeks, but damn it feels longer.  I'm so sorry but I had some personal growth to do and now I feel better than ever :) and I am happy with the steps I've taken in the last couple of weeks and have re-lit the flame of my passion again and it feels great!  My baking and blog no longer feels like a chore (cue the happy dance), which really had me down, but now being rejuvenated, I am ready to hit the ground running :)

So I have found some great outlets with some supportive women to help me get through my bad days, there is even a luncheon that we have once a week which means a whole new group of people to feed my baked goods.  At first I was nervous (surprise surprise) about having a whole slew of people trying my treats, but then I just reminded myself that I'll only get better when I have a wider spectrum of people's feedback.  It might sound funny, but I feel like a new woman, with an even brighter flame for my "torch of passion" ;) and I am trying new things and recipes like nobody's business.

Now the recipe I have for you guys tonight isn't a new one, it's actually a new version of a recipe I've shared with you before.  It also isn't one that I brought to the luncheon, those babies will start coming out tomorrow, and they are yummy and delicious.  So do you remember waayyyy back when I introduced myself to kale?  Well I was in the grocery store a week or so ago when I came across it in the produce section again, and I decided that I would make it again but would change it up a little bit.  Without further ado, I present to you my new and "fresh" kale chips!

Canuckette's Twisted Kale Chips
Ingredients
1 bunch of Kale
mint, fresh
garlic powder
sea salt
cayenne pepper
black pepper
celery salt
olive oil

Directions:
1)   Preheat oven to 350F.  Wash the kale and mint, cut the leaves off of the spine, chopping the leaves into bite size pieces and place in a bowl.

2)  Add olive oil (maybe a couple of tablespoons, I don't use measurements) and all of the spices.  Toss the mixture to distribute the spices and oil evenly.
 

3)  Line a baking sheet with parchment paper and place the kale on it in a single layer.  Place into the preheated oven and bake for 15-20 minutes or until crispy.

4)  Allow to cool, and enjoy your healthy yet salt satisfying treat!

Adding the mint gave the kale chips this refreshing kick to them, and the celery salt gives it a clean yet salty taste as well.  This was a spur of the moment kind of recipe.  I didn't plan a single ingredient as I originally was going to use the kale in a salad but forgot about it and needed to use it quickly before it spoiled.  I encourage all of you to try your own twists on this recipe, adding different spices and herbs to take it to a whole new level of fresh and healthy :)

Now I know this post is a little short, but I'm getting back into the swing of things and feel that if I keep writing I might start rambling on lol which isn't too much of a stretch.  However, tomorrows post will be new and exciting and I may even let myself ramble a little since I have missed you all so much :)  Until next time...............


Stay sweet,


Jennifer xoxoxo