Showing posts with label carrots. Show all posts

Monday, September 23, 2013

Stewing With Ideas

Hello Sweets,

Well last night was the first step in moving forward with my little business, and it was more stressful than I anticipated -_-  I am trying to create my website and just like when I was designing my blog I am putting entirely too much pressure on myself, but I just want it to be perfect!  I found the right layout, now to focus on color, pictures, content.....  Ya that is what is tripping me up, lol myself :p  So I decided to take a little break and write a little post for y'all :)

This is the last post from my Texas stash :(, but as the saying goes I've saved the best for last.  For the last two years Nathan has been bragging about his delicious stew, yet until recently we had never made it.  Lucky for me he made it a few days before I left, and I made my deliciously sweet cornbread to accompany it :)  Growing up when my grandfather made stew it was a thicker style broth, the way Nathan prepares it it's more of a broth.  Now don't get me wrong it's absolutely delicious, it's honestly the best stew I've had :)  And now it's time to share with y'all!

  Nathans Super Delicious Stew
Ingredients
2lbs stewing beef, cut into bite size pieces
red potatoes, chopped
onion, chopped
carrots, chopped
celery, chopped
2 cans tomato sauce
Worcestershire sauce
teriyaki marinade
garlic, chopped
parsley
black pepper
salt
seasoning salt
garlic salt
garlic powder
oregano
beef bouillon cube, dissolved into hot water


Directions:
1)   Tenderize meat, season with spices and add marinade and Worcestershire sauce.  Mix well and allow to sit for at least six hours.


2)  Meanwhile, chop all veggies.  Don't worry about uniformed cuts as it is a rustic meal :)
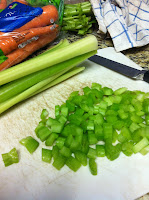


 3)  Place veggies into a large cauldron with the tomato sauce and dissolved beef bullion cube.  Keep on a low simmer.
 

4)  Take the beef and place into a frying pan, be sure to save the marinade to add to the broth.  Brown the meat slightly as to not fully cook it, the beef will finish cooking in the cauldron.
 

5)  Add the partially cooked beef to cauldron, also adding the marinade.  Also add in additional seasonings, but not too much because as it cooks you'll taste and adjust. 


6)   Bring to a boil and reduce to a simmer, covering with a lid to cook for 2-3 hours.  Taste as you go along adjusting spices as needed.
 

7)  Once all the veggies are soft and you've achieved the flavor you're looking form enjoy!

 
doesn't it look so delicious!!

This stew is so good, it's full of flavor and very filling.  I didn't add anything extra to mine because Nathan made it perfectly delicious!!  Once it was paired with the sweet cornbread it was a perfect dinner, not that it needed anything more.  To be honest, this would be the perfect dinner for a cold Canadian night....which is now so I want!!  Lol I don't have any so I'll have to make something else for dinner :(

Now I need to get back to creating my website, but I don't know why I'm having such a difficult time :(  Maybe I just need to remember why I'm doing this, and stop over thinking it.......but if any of my lovely readers has any helpful suggestions they are more than welcome :)  But in the meantime I'll be brainstorming away behind my laptop, until something wonderful hits me :p lol ya I'm cheesy.  Until next time.....


Stay sweet,


Jennifer xoxoxoxo

Wednesday, February 27, 2013

Eh, What's Up Doc?

Hello Sweets,

You've made it to the middle of the week :) and now I'm sure most of you are counting down the days until the weekend right?  I'm honestly excited for tomorrow, and I am sure you are thinking to yourself what's so special about Thursday?  Well firstly it's the night a new episode of The Big Bang Theory is shown, secondly when I'm in Texas on a Thursday it's steak night (YUM!!) and when it's Nathan behind the grill it's guaranteed deliciousness, and thirdly I'm getting a hair cut!!  I know normally a hair cut is nothing big, but it's been well over a year since I've had a haircut and I am so over due that I am trusting the good reviewers on Yelp to help me find a fantastic salon here in Texas, and most girls will tell you trying a hairdresser you know nothing about can be kind of scary, so send positive vibes for me tomorrow :)

Any who, you guys don't come here for tales of new hair adventures, but you do come for good eats and that is exactly what I have for you today, I'm actually spoiling you with two recipes instead of just one (I love you guys that much!).  I'm not sure if you remember but a few weeks ago I was talking about doing some posts about revamped food from our childhood, only problem was I never got around to it :(   But today I am bringing you a recipe that I used to have all the time as a child, but with a sweet little twist to it.  I even brought it to a luncheon I had that same week and needless to say there wasn't anything to bring home, but the best part was no one could put their finger on what the mystery ingredient and when I told them they were pleasantly surprised.  Now enough talk, lets get you in the kitchen and creating with another great recipe inspired by the wonderful app AllRecipes (seriously if you haven't gotten it yet you really should).

Carrot Pineapple Cake
Ingredients
 2C all-purpose flour
2Tsp baking soda
1 Tsp baking powder
1 Tsp salt
2Tsp cinnamon
1 3/4C sugar
1C extra virgin olive oil
3 eggs
1 Tsp vanilla extract
2C carrots, shredded
1C coconut, shredded
1C pecans, chopped
1C pineapple, crushed and drained

Directions:
1)  Preheat oven to  350F.  Grease a 9"x13" baking pan and set aside.  Mix flour, baking soda, baking powder, salt, and cinnamon.
 2)  Make a well in the center and add sugar, oil, eggs, and vanilla.  Mix with wooden spoon until smooth.
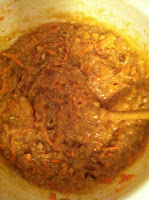
the well was over"whelmed" lol

3)  Stir in carrots, coconut, pecans, and pineapple.

4)   Pour into baking pan and bake for about 45 minutes, or until a toothpick inserted into the center comes out clean.  Don't panic as the center will sink slightly.  Allow to cool before icing.

Cinnamon Coconut Cream Cheese Icing
Ingredients
8oz cream cheese
1/4C butter, softened
2C powdered sugar
1 Tsp cinnamon
dash of allspice
1/2C pecans, chopped
cinnamon and allspice not pictured :/

Directions:
1)  Cream the butter and cream cheese together until smooth.  Add the spices and icing sugar and beat until creamy.

2)  Ice the cake and top with the chopped pecans.
Forgot to take a pic and only this tiny piece remained

This is very moist and has a wonderful sweetness that is created by the pineapple.  I like carrot cake, but I don't think regular carrot cake will cut it anymore, lol.  This is definitely a keeper and will be made again.  If you decided to make it you can change (or even omit) the nuts, and play with the spices a little I didn't follow the measurements to a t, but that is just how I bake :)

So there you have it, the final recipe that was waiting to be published, and it's good timing too, because when I'm here in Texas I do nothing but spoil my sweetheart with sweet and delectable treats ;)  Tomorrow I think I will blog about our dinner, he is making the steak and I am in charge of the veggies so it is a joint meal, and maybe I can even get him to write a little about his marinating techniques if we're lucky!  And be on the lookout for a delicious chocolate peanut butter duet that is sure to be a hit, I say that because as soon as I saw the idea I had to make it a reality.  Until next time............


Stay sweet,


Jennifer xoxoxo

Monday, February 4, 2013

Never Judge A Dish By A Cook

Hello Sweets,

Did you enjoy your weekend?  Hopefully you are having a relaxing Sunday and maybe even tried a new recipe :)  I've been try a lot of new recipes lately with great results mind you ;), but the one thing I've realized is that normally I will end up craving some of my "regular" favorites, but not lately I just want to try something new.  I am really enjoying exploring new foods and new techniques, I feel like I'm spreading my little kitchen creative wings (I know I'm just too cute right?).  Now don't get me wrong, I have been using familiar ingredients a lot, but I'm trying to use them in new, unique, and tasty ways.  I try to choose healthy choices when I come across them but I'll be honest that I enjoy all foods even the bad ones, but I strongly believe in moderation so you can still enjoy the finer, tastier things in life.

So as I have been mentioning over a few posts that I've been reminiscing about when I was younger, memories being in the kitchen with grandma and mother or even when I started cooking on my own.  It's funny how things that completely gross us out as children can become a food that we love as adults.  Now don't get me wrong, there are some that don't (for me it's olives, ick!).  What I've found is that it's not the actual food that I didn't like but just the way it was prepared, an example would be I love my grandfather's, mother's and my own spaghetti,  but take me to a restaurant and there is no way I'm ordering it after every disappointment.  What do you think the main difference is?  I think it's two things; 1) it's made with care because you're feeding the ones you love and 2) it's made with love, cooked slow and constantly adjusting the spices to achieve the right flavors.  It's not rushed, but almost built into a beautiful masterpiece that you are more than happy to share with everyone.

So I decided to do today's post on something that I absolutely HATED as a child, no matter who made it or what was in it I was not touching it, and that was coleslaw.  However I've always liked English style fish and chips (thank you grandma :)) which normally comes with coleslaw as a side, a side that always stayed in its little dish.  That was until one day at a restaurant (which I can't remember the name of, it's been a few years) the coleslaw looked much different than I had ever seen, and appetizing enough to give it the good old college try!  The main aspects to the dish that really caught my interest was it was very colorful (full of more than just green cabbage) and the dressing was very light and not a mayonnaise base dressing, and low and behold it was delicious!  From then on unless it looked like a sloppy mayo mess I tried, and then had a desire to make some of my own and see if it works out like I was envisioning.  Then came the perfect opportunity, every year our home office has a potluck lunch where each department brings a dish or two and everyone enjoys a free delicious lunch.  Since I work for a fitness company I figured it's healthy, high in fiber, and it makes a big portion, that it would be the perfect chance to really shine (and yes I had a back up just in case it was a flop).  So I prepped my coleslaw a day in advanced to really let the dressing absorb in, tried it to make sure it was edible lol and it was same quality as the dressing that turned me into a real cabbage patch kid (lol 80'd kid joke).  When I brought it to work I created a little information card that so people would know what's in it and to let them know some of the healthy parts of it, and I think it's a good sign when you pick up the bowl and it's completely empty!!  Definitely made me feel pretty good and I love my recipe so much that I'm going to share it with you today :)

Canuckette's Colorful Coleslaw
Ingredients
1/2 head cabbage, shredded
1/2 medium red onion, diced
1 1/2C carrots, grated
2 stalks celery, chopped
1C white sugar
1C white vinegar
3/4C extra virgin olive oil
3/4Tbs salt
1Tbs dry mustard
1/2Tsp garlic powder
black pepper to taste
 garlic not pictured as it was a last minute addition, again lol

Directions:
1)  In a large  bowl, combine cabbage, onion, carrots, and celery.

2)  Sprinkle with sugar, and mix well.
 
second picture is to show the neat texture and colors

 3)  In a small saucepan, combine vinegar, oil, salt, dry mustard, garlic powder, and pepper.  Bring to a boil.

4)  Pour dressing while still hot over cabbage mixture, and mix well.

Simple and easy but healthy side dish great for anytime of the year, for lunch or dinner.  I let the coleslaw sit for at very least 24 hours (longer if I can), and drain any excess liquid before plating or serving.  Now that I've made this I'm craving fish and chips lol.  Dang not sure if I have what is needed to whip that up hmmmmmm.  I guess you'll find out in the next few posts :)

  Well my lovely readers, I have not slept in over 24 hours again and as my wonderful roommate would verify I am going a little crazy, in the certifiable way ;)  I  think it's time for a mid day catnap :)  Until next time...............


Stay sweet,


Jennifer xoxoxo


Saturday, November 10, 2012

Soup's On!!

Hello Sweets,

I hope you are all having a wonderful weekend.  Mine so far has been fairly low key, which is a good thing, but I may get to see a couple of friends tonight for some post birthday laughs!  I talked with Nathan last night, and we've decided that I am still twenty-eight since we have yet to celebrate my birthday together (every girls dream lol), but I really liked the sound of that because he is the one person I do want to celebrate my birthday with!  Now don't get me wrong, I love all my family and friends, but he has a way about him that can make me forget, even if just for a moment, that I'm constantly in pain.  But enough about me, lets get to the meat of this blog, or in this case the chicken lol!!

I don't know about you guys, but the smell of freshly made soup wafting through the house is absolutely divine.  I don't remember clearly who had made soup from scratch in my house, but smelling the soup I am making right now, is giving me a nostalgic feeling that is reminiscence of my childhood.  Soup is really a great dish to make during the colder months, not just because it warms you up inside or is easy to make, but more importantly it stores and keeps fabulously!  You can literally throw in whatever your heart desires, because after all, it is your soup :)  I feel like soup is the "everything but the kitchen sink" kind of meal, because you can go through your crisper, cupboards, and leftovers to create a one of a kind creation, that is completely reflective of your pallet.  Now I made a dumb move, and instead of boiling down the bones into a broth, I threw them out (smh).  A girlfriend of mine (Heather), her boyfriend just got back from deer hunting, so overnight she had made the broth for her soup (yes I am a little jealous but now I know for next time).  So I just ended up using boxed broth.  I know not a great choice, but I did buy the lower sodium, and used all fresh ingredients for the rest (with the exception of my leftover chicken).  As of right now, it has been simmering for just over 35 minutes, and I have topped up the broth and added the noodles, within 30 minutes it will be all done and ready to eat!  Now lets get to this delicious recipe, so all of your homes can smell as savory as mine ;)

Canuckette's Chicken Soup
Ingredients
1/2 Box Whole wheat rotini noodles (or which ever you prefer)
1Qrt Chicken broth (or make your own)
1-2C Chicken, diced
1Tbs Extra virgin olive oil
3 stocks Celery, diced
3 Carrots, diced
2 potatoes, diced
1/2 Spanish onion, diced
Bay leaves
Garlic
Celery Salt
Sea Salt
Black Pepper
Whole Coriander, crushed
Oregano

Directions:
1)  In a large soup pot, heat the olive oil, meanwhile dice all the vegetables.  Place vegetables into pot and stir for 3-5 minutes, or until they start to soften.  Then add the garlic (about 1Tsp), allow to become aromatic (about 30 seconds), before mixing into the vegetables.
Before and After

2)  Dice the chicken, add to the vegetables, and top with the broth.  Add all your spices, I didn't give measurements because I don't use them I use my nose (if I had to guess; 4 bay leaves, 1Tsp garlic (after softening the veggies), 1/2Tsp celery salt, 1/2Tsp sea salt, 1Tsp pepper, 1/2Tsp coriander, and 1/2Tsp oregano).  Let simmer for at least thirty minutes, on low to medium heat.
Before and After simmer

3)  While that is simmering, boil your noodles.  I tend to leave them "al dente", because they will cook a little more on the final simmer.

4)  Add the noodles to the simmered vegetables and broth, at this point you'll be able to see if you need to top up the broth, or if you need to adjust the spices.  Let simmer on low for another fifteen minutes at least.
already looks and smells so good!

5)  Remove from heat, and serve, or divide up among containers to freeze and store.  But most importantly enjoy the fruits of your labor.
one for the fridge and one for the freezer :)

Now I like a heartier soup, so I opted out to adding anymore liquids to mine, but I did try some and it is a very nice, mild chicken noodle soup with plenty of vegetables with each bite!  I don't add a lot of salt because some people like it saltier than others, but you can always add this when you make your own bowl. Every time I make a new recipe I always make mental notes, what could I add more of, what can I include next time that I didn't this time.  And this soup is no different, although I think my next adventure will be trying my hand at the McWhorter stew that Nathan and his grandmother make :) I do after all, love family recipes that get passed down from generation to generation, like my grandmothers banana bread, or my grandfathers baked rice.  Perhaps tomorrow I'll do a biscuit or bread to accompany my soup, I guess you'll just have to come back and see ;)

Do you have a favorite soup you like to make?  Or maybe a favorite that someone in your family makes?  I always love hearing from everyone, with suggestions or even just fun facts.  Until next time..........

Stay sweet,


Jennifer xoxoxo


Thursday, October 18, 2012

The quickest way to a mans heart, is through his stomach!

Hello Sweets,

One of my favorite times to bake or cook is for those that mean the most to me.  Nathan is my absolute favorite person to cook for, and cooking for his family is very important to me, or better yet that they like what I make.  At the risk of sounding old fashion or dated, I really do want to be that wife and mother who cooks and bakes on a regular basis.  Some of my fondest memories as a child were being in the kitchen with my grandmother baking (my favorite part was the flour sifter lol), and watching my mother in the kitchen cooking dinner, but not following a recipe but using her sense to determine the right flavors.

Needless to say, today's post is about not one, not two, and but three recipes!  I made Nathan and his father a yummy chuck roast dinner last night with all the fixings.  I went out immediately after to spend some quality with Nathan's aunt, so I only got the "thanks for dinner Canuckette, that was good".  So of course when I returned later that evening, I asked Nathan what his dad really thought, and this is the direct quote from his father,"girl can cook".  This makes me very happy because I love knowing how much his family likes me, family is very important to me, and when you date someone, you connect two families together, and that is precisely what I want.  So for dinner last night I made a chuck roast with roasted potatoes, onions, carrots, corn, gravy, and Yorkshire pudding (a little bit of English to our country dinner).  Everything is relatively simple to make, but remember as with anything you make, make it from the heart ;)

Okay on to the recipes!!

Chuck Roast
Ingredients
coarse black pepper
 garlic powder
some fresh roasted garlic
Lea & Perrins Worcestershire sauce
 Lowry's Steak and Chop marinade
sea salt, Lowry's seasoning salt
 Adolph's meat tenderizer
5 medium sized potatoes, chopped
5 whole carrots, chopped
1/2 a large yellow onion, chopped
1C beef broth or 1 bullion cube, dissolved

My roast soaking in its bath lol

Directions:
1)  Go to the butcher and ask for a chuck roast or seven bone roast (the bone in the center is shaped as the number seven), the more marbling, the better the flavor.  Now I cannot give you the weight of the one I made last night as they bought a whole cow and just had the butcher package their meat for them, but we fed about 6 people.  Now, if you have time you should season or marinade the beef overnight, this way the meat really soaks up all the flavor and will fall apart.  Also, pierce the meat with a fork to allow that much more absorption.  Choose what ever seasonings/marinade you would use of a steak, I do not use BBQ sauce on a roast but that is my preference.  Apply any liquids you chose to use first as to not wash away the seasonings.  Your marinade mixture doesn't necessarily have to submerge the meat, about half full will do, just be sure to flip the roast over at least once (preferably about halfway from prep to cook), then place in the fridge overnight. If you don't have time for overnight, try and get a least a couple of hours. Be sure not to dispose of the mixture the roast is in, as it will contribute to cooking in the flavor, moisten, and will serve as the main ingredient in the gravy 

2)  Preheat your over to 375F. While the oven is preheating, cut up your potatoes, onions, and carrots.  I like a rustic type of meal with my roast, so I tend to cut bigger and not uniformed.  Place the veggies around and on the roast, top with a little bit of beef broth or bullion, cover with tin foil.  Place into the oven for 2 hours, checking after one to ensure the veggies are not drying out, if they are, add a little more of the broth to moisten the veggies.
standing room only!

While that was cooking, I moved on to prepare the Yorkshire puddings!  I start this one hour into the roast cooking to allow the batter to sit for 30 minutes, and then cook in the oven with the roast for the last 30 minutes.

Easy Yorkshire Pudding
Ingredients
3 eggs
1C milk
1C all-purpose flour
2tbs butter

Directions:
1)  In a medium bowl, beat eggs with milk.  Stir in flour and set aside. 

2)  Divide butter evenly into the 12 cups of a muffin tin, about 1/2 tsp per cup.  Place empty tin into the oven to melt the butter for 2-5 minutes.  Remove tin from oven, and distribute batter evenly among buttery cups.

Completed batter and butter divided 
notice the brown on the edges?  That's the melted butter

 3)  Bake in preheated oven for 5 minutes.  Reduce heat to 350F, and bake for 25 minutes more or until puffed and golden.  It is okay to drop the heat while the roast is still cooking as it is only for the last 30 minutes.

All done, YUM!

Next up is the gravy!

Simple Gravy
Ingredients
1 1/2C of the roast drippings
flour

Directions:
1)  Transfer 1C of the drippings into a sauce pan and bring to a boil.  Slowly add flour to thicken the consistency.  If lumps form, add a little more of the drippings.  Depending on your preference of thickness, continue adding flour until you've reached your desired consistency.

2)Enjoy!


Completed feast in all its glory, boys couldn't wait to dig in obviously lol

Needless to say, no one went hungry last night, and we even enjoyed some for lunch today :)  Now tonight I am going to make the famous pumpkin spice cupcakes and will be posting that little gem tomorrow!  Until then....

Stay sweet,


Jennifer xoxoxo