Showing posts with label cocoa. Show all posts

Tuesday, January 28, 2014

Just One Minute Sir!

Hello Sweets,

I have had one busy day, and it's not done yet.  I am running on next-to-7no sleep so food is what is keeping me going (I'm eating while typing this lol), but I have a feeling I'll crash the second I step foot back into the house.  Let me tell y'all what kept me running around all day today, I got my keys!!!!!!!
aren't they perfect :)

So it's official and in my possession, and I've even started filling the cupboards with all the kitchen goodies that wouldn't fit into my cupboard (yes singular).  I'm so excited for Saturday when the big move happens, until then I will be doing small trips with my extra food and my breakables because something always gets broken when I let someone else do it for me :p

Since I have a meeting that I need to get to within the hour, I thought it would be a perfect fit for tonight's recipe.  Have you ever craved cake later in the evening?  And the thought of a whole cake is just asking for trouble?  Then cake in a cup is exactly what you need!  I've seen many different recipes, pins, and instagramed articles about these but never tried it myself.  That all changed when Nathan decided to text me that he was enjoying some gooey chocolate pudding cake, not fair!!  So of course I went into research mode, determined to find a quick little chocolate cake.  I hit the jack pot when I came across the Yummy Mummy Club.  I kept coming back to this recipe, so it was decided right away that chocolate cake in a cup had been found!

5 minute Chocolate Cake in a Cup via yummy mummy club
Ingredients
4Tbs flour
4Tbs sugar
2Tbs cocoa
1 egg
3Tbs milk
3Tbs oil
3Tbs chocolate chips
dash of vanilla
1 large coffee cup
 

Directions:
1)  Add dry ingredients to the mug and mix well.
 

2)  Add the egg and mix thoroughly.  Add milk and oil, mixing again.
 

3)  Add chocolate chips and vanilla, mix.
 

4)  Place mug into microwave and cook for 3 minutes on high.  The cake may rise over the top of the mug so don't be alarmed if it does.


5)  Allow to cool a little and then tip out onto a plate (or eat straight from the cup!).


I dolled my cake up by sprinkling some icing sugar on top :).  The cake itself is quite moist considering the method it's made by. The only thing that stood out a little too much for my tastebuds was an eggy taste, further research post devour has given a few different options like beating first and only using a few tablespoons. 

Well I'm in the car finishing this, and I hate to cut it short but I don't really have a choice lol.  I'm trying to keep my creative juices going but it's hard when things are being packed up and shipped over to the new place ;)  Until next time....


Stay sweet,


Jennifer xoxoxoxo


Monday, January 13, 2014

Chocolate Warm Ups

Hello Sweets,

Since it's Monday I thought it would be fun to do a small, simple, but always delicious post :)  For those of you whom aren't familiar with my blog geographically, southern Ontario Canada has been getting pummeled by old man winter.  Thankfully for me I've been in Texas since Christmas so the weather here has been significantly milder, but I am not looking forward to my return home later this week :/  I have my winter jacket and boots with me so I am prepared clothing wise, but today was  70F (21C) so I am sure no matter what I wear I'll be freezing.

What is your favorite beverage on a cold winter day?  A hot cup of coffee or tea?  Maybe you add a little Baileys, lol or maybe you're completely PG like me and you enjoy a good old fashion cup of cocoa :D  I hadn't had a cup of cocoa in years, so in November when the DFW area got slammed by an ice storm cocoa went on the "must buy" shopping list.  Funny thing about the ice storm though, it caused deliveries to stores (ie; grocery stores) to become non existent lol.  I have never been in a grocery store where the eggs, milk, and many other things were completely sold out.  Of course the cocoa section of the grocery store was cleaned right out, well except for the instant add hot water thingies.  However, Nathan prefers the ones that require you to softly boil milk so they were not an option, actually I prefer them now too lol.  Feeling almost defeated we went to Starbucks to get some lattes, seeing they still had some of their cocoa left we decided that would do in a pinch.

Super Simple and Easy Cocoa
Ingredients
hot cocoa powder
milk
mini marshmallows or whipped cream
Ghirardelli makes everything chocolate even more amazing!!

Directions:
1)  Determine how many cups you'll need to make, if using large cups use 1 1/2 - 2 servings per person.  Measure out amount of milk needed, place into a saucepan and bring to a slow boil.

2)  Once boiling, add 1-2Tbs/cup of the cocoa powder and mix well.

3)  Pour into cups, top with mini marshmallows or whipped cream.  If you only have regular marshmallows, cut them into smaller pieces with a sharp knife (it will be uber sticky, so use patience). 
sticky, yet yummy work


perfect addition to a cold cuddle night
See, simple but delicious :)  Nothing beats a hot cup of cocoa on a chilly night, well nothing except cuddles!  Until next time....

Stay sweet,


Jennifer xoxoxo


Wednesday, September 18, 2013

O.M.(chocolate)Goodies!

Hello Sweets,

I'mmmmmmmmmmmm baaaaaaaack!!  Lol yes it does feel great to be back at my computer for my blog, and on a regular basis ;)  I'm also trying out some new recipes this week, I started tonight with a delicious roasted chicken and my kitchen smells so good.  Yes it would have been cheaper to just pick up a pre-made one at the grocery store, but we all know that is not the Canuckette way.  Not to mention I wouldn't know what went in the prep or how to cook a moist whole chicken, but now I do!!  However, that tender and juicy recipe will not be revealed today, today I wanted to write something sweet instead and no I'm not talking about a little love note ;)

Everyone loves brownies right?  I know what you're thinking, I've already done brownies.  These brownies, much like their name, are the best brownies ever (so far)!!  I wanted a brownie that had a frosting on top, as those were my favorite when I would buy the boxed stuff *hangs head in shame*.  But that is not the way I bake anymore, only with heart and love now and that means no more boxes!  Nathan and I went to visit some of my family in Florida a couple weeks back, we flew over in his small airplane which took 6 1/2 hours but with views like this who can complain;


 so pretty right?

So keeping with my new love of sharing my baked goods I wanted to bring some brownies for the family to enjoy :)  Yes I know, total dork, but that's just me and I'm okay with that ;)  Lets get to the yummy treats shall we?

The Best Brownies
Ingredients
14Tbs butter
4oz unsweetened chocolate, chopped
1 1/2C sugar
2 1/4Tsp vanilla
2 large eggs
1C flour
1/3C pecans, chopped
2 1/4C powdered sugar
1/2C unsweetened cocoa powder
3-4Tbs milk
 
only the best chocolate for my man ;)

Directions:
1)  Preheat oven to 400F.  Grease an 8" square baking pan.  In a large heavy saucepan over low heat; melt 8Tbs of butter and the chopped chocolate, stirring constantly.
 

2)  Remove from heat and stir in sugar, 2Tsp vanilla, and eggs (one at a time).


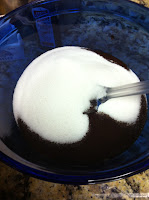
 mmmm chocolate!

3)  Blend in flour and pecans.


4)  Spread batter in the prepared pan and bake until brownies just start to pull away from the sides of the pan; 18-22 minutes.
 

5)  To prepare frosting; in a medium bowl with an electric mixer, beat remaining butter and vanilla until creamy.
 

6)  At low speed; gradually add powdered sugar and cocoa powder alternately with milk, beating well after each addition until frosting is smooth and fluffy.
 

7)  Frost brownies when removed from oven by gently spreading on.  Cut into 16 squares.
 
(I forgot to take a picture of the completed brownies :( )

These brownies are so moist, chocolaty, and AMAZING!!  Lol these are close to what I'm striving for in my perfect brownies, I love brownies with frosting so this is a keeper :)  Only thing left to do is to make small little changes until they're worthy of a Canuckette title ;)

As much as I would love to write a little more for y'all, I have a migraine starting and I also have some research to do.  Yes the research is food related, and of course it is a surprise ;D  Until next time...........


Stay sweet,


Jennifer xoxoxoxo


Thursday, December 27, 2012

Jack Frost Nipping at Your Nose?

Hello Sweets,

Merry Christmas to all of my readers, from the great state of Texas!  I hope you all received some special kitchen tools from Santa, I know I did.  But more on that later, today was our first of two Christmas dinners and I would say it went off pretty much without a hitch.

Since I am writing this on Christmas eve (because even bloggers need a day off now and then) I thought I would keep it festive, so I saved one last holiday cookie recipe to share with all of you :)  I have some great memories from when I was a little girl and I am going to share one of those moments with you.  I come from Canada, and if you know your geography you know that no matter where you are in Canada, winter means snow, and a lot of it.  Well you knew where to find all the neighborhood kids when the snow started falling; outside enjoying the winter wonderland (although I no longer feel that way).  And when we finally were convinced to come inside every single part of us was frozen, sometimes even my mittens had icicles on them lol.  My grandmother would always make us hot cocoa with little tiny marshmallows in them, and it is a drink that I still enjoy today on a chilly night.  Well when I came across a recipe for hot cocoa cookies I couldn't pass them up!  Lets get to the warm gooey goodness that is this cookie :)

Hot Cocoa Cookies (via The Food Network Magazine)
Ingredients
2 1/4C cake flour, plus more for dusting
1/4C unsweetened Dutch-process cocoa powder
1 Tsp baking soda
1/4Tsp salt
1C butter, room temperature
3/4C sugar
1 large egg
1 Tsp vanilla extract
1/2C marshmallow cream
 

Directions:
1)  Sift the flour, cocoa powder, baking soda, and salt into a medium bowl.
 

2)  Beat the butter and sugar in a large bowl with a mixer on medium-high speed until light and fluffy, 3-5 minutes.
 

3)  Add the egg and vanilla and beat until incorporated.
 

 4)  Reduce the mixer speed to low; add the flour mixture in two batches and beat until just incorporated.
 

 5)  Divide the dough in half, wrap in plastic wrap and refrigerate until firm, at least 1 hour and up to 1 day.

6)  Line 2 baking sheets with parchment paper.  Working with one piece of dough at a time, dust the dough generously with flour and roll out between 2 pieces of parchment paper until about 1/8" thick.  Cut out shapes using 2 to 4 inch cookie cutters and transfer to the prepared baking sheets.  Gather the scraps and refrigerate until firm; re roll once to cut out more cookies.  Refrigerate the cutouts until firm, about 30 minutes.
 

 7)  Position the racks in the upper and lower thirds of the oven and preheat to 350F.  Bake the cookies, switching the position of the pans halfway through, until slightly puffed and darker around the edges, 12-15 minutes.  Let cool 5 minutes on the baking sheet, then transfer to racks to cool completely.  Sandwich the cookies with the marshmallow cream.
forgot to take a full picture, but don't these 2 look lovely :)

Well folks there it is, the final holiday cookie recipe I have for you.  Now that doesn't mean I won't be baking any goodies in the near future, have you heard me talk about my sweet toothed sweet heart??  Lol but who knows what Canuckette will bake next, heck I'm her and I don't know yet.  

I do want to warn you guys, I will have a couple of "technical" posts coming up. I just got a whole whack of fun kitchen toys from Nathans family and frankly I am SUPER excited to share with all of you :)  But I think my turkey tiredness is starting to kick in, so I will leave you with well wishes and a merry Christmas!  Until next time.......


Stay sweet,


Jennifer xoxoxo